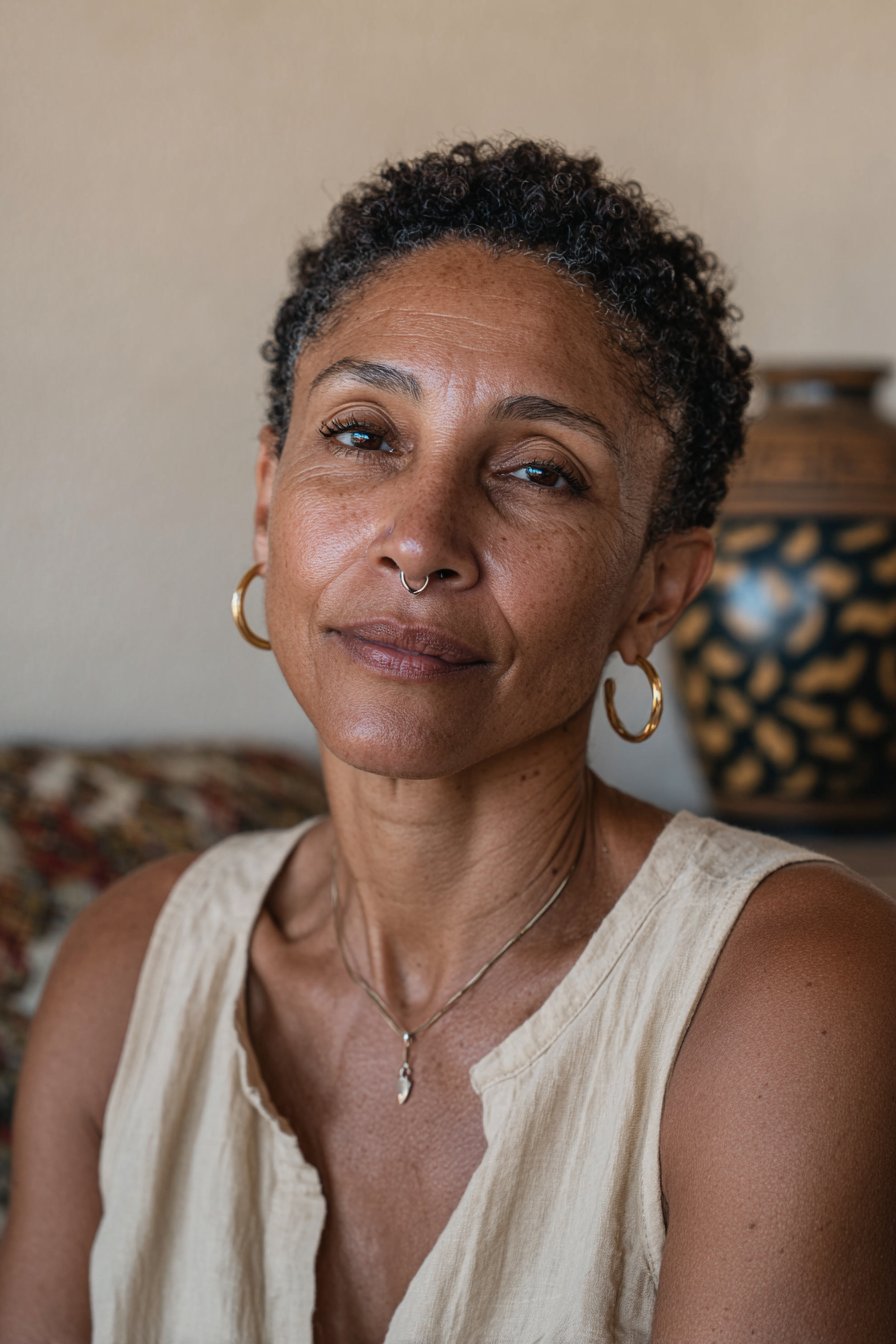
I’ll never forget the first time I mastered flat twist hairstyles for black women – walking out feeling polished, protected, and ready to take on the week. Flat twists have been a go-to style for generations, and as a matter of fact, they’re still one of the easiest ways to rock a protective look. These low manipulation styles are excellent for natural hair and perfect for length retention, especially when you tuck the ends away to protect the most fragile parts. In this guide, I’m sharing 12 stunning flat twist updos and flat twists hairstyles natural hair that I love, complete with tutorials on how to flat twist, short flat twist hairstyles options, and my favorite flat twist updo hairstyles.
Classic High Bun Flat Twist

What Makes This Style Timeless
The classic high bun flat twist holds a special place in my styling repertoire. During my years working with clients, I’ve watched this look transform everyone from business executives heading to boardroom presentations to relaxed social gatherings where elegance still matters. The beauty lies in its height and simplicity, which bring an instant sense of polish and competence.
What strikes me most about this style is how it accentuates facial contours and brings out the neckline. I learned this early on from watching transformations at my grandmother’s salon, where women would walk in tired and leave standing taller. The high bun focuses attention directly on your face while elongating it, making it particularly flattering for round or square face shapes. Equally, it pairs beautifully with high-necked dresses and blouses, or tops cut low in the back that show off your neck and nape. I often recommend this style to clients planning bold makeup looks, as the updo provides the perfect canvas.
How I Style the High Bun Flat Twist
My technique for creating this flat twist updo hairstyles combines the protective benefits of flat twists with the sophistication of a high bun. Start by washing and conditioning your hair thoroughly, taking special care to cleanse your scalp since it will be more exposed. Work on damp hair for better grip.
- Section your hair and create flat twists starting from your hairline, working backward toward the crown
- Keep consistent tension as you twist, pulling hair back (not straight up) to avoid stress on your roots
- Once all sections are flat twisted, gather them at the top of your head
- Wrap the twisted hair around the base to form your bun
- Secure with bobby pins and a hair band for stability and longevity
- Tuck the ends beneath the spiraled hair
The entire process takes just a few minutes once you’ve mastered the technique. In fact, the combination of flat twists leading into a bun offers both the protective qualities of low manipulation styling and an elegant finished look.
Best Hair Types and Lengths for This Look
This style works across various hair lengths and textures, making it suitable for natural hair, relaxed hair, and transitioning hair. However, I find it particularly stunning on clients with medium to long lengths who want to showcase their hair’s volume.
My Maintenance Tips
Here’s where I share something crucial: avoid making your high bun too tight. I’ve seen clients develop traction alopecia from constantly wearing styles with excessive tension. You shouldn’t feel pain when you smile. Loosen the bun slightly and use gel or styling product to slick down errant strands instead of relying on extreme tightness.
Switch up your style regularly rather than wearing the high bun continuously. Your hairline needs breaks from the constant pulling. Between styles, preserve your look by sleeping with a satin or silk scarf. For moisture retention, I recommend applying a leave-in conditioner daily to keep your scalp and twists hydrated.
Flat Twist Updo with Side Sweep

Why I Love This Elegant Style
This side-swept updo became one of my go-to styles after a particularly frustrating morning when I hated how one side of my hair turned out. Instead of starting over, I swept everything to the side and created what I now call my signature 80’s-inspired flat twist updo. The experience taught me that some of the best styles emerge from creative problem-solving.
The side sweep brings a soft, romantic quality that differs from centered updos. I find it particularly flattering for asymmetrical necklines and off-shoulder looks. When flat twists swoop across and gather to one side, they create movement and visual interest that draws the eye. This versatile look can be customized to fit any occasion, easily swooping up into a super-chic updo.
Step-by-Step Styling Guide
Working on damp hair gives me the best results for this style. Start by parting your hair deeply on one side. Create flat twists beginning at the heavier side of your part, angling them diagonally toward the opposite ear. The twists should follow the natural curve of your head as they move across.
Once you reach the back, gather all your twists at the nape on the lighter side of your part. Secure them into a low side bun, wrapping the twisted hair around itself. Pin everything firmly in place. The compact updo works beautifully for active lifestyles while maintaining an adorable, polished appearance.
Occasions Perfect for This Updo
I recommend this style for weddings, formal dinners, and professional events where you want sophistication without appearing too severe. The turn-of-the-century inspiration gives it a timeless quality that photographs beautifully. Wedding guests particularly love how it stays secure through hours of dancing yet looks effortlessly elegant.
Products I Recommend
For this style, I rely on Camille Rose Naturals Curl Love Moisture Milk as my base moisturizer, followed by Blueberry Bliss Curl Control Jelly by Curls for hold. When working on previously styled hair, I start with As I Am Leave-in Conditioner, then use Camille Rose Naturals Almond Jai Twisting Butter for the actual twisting process. These products provide the right balance of moisture and definition without creating buildup.
Flat Twists into Low Bun

The Appeal of This Protective Style
Back when I worked at my grandmother’s salon in Charleston, I watched countless women request the same look week after week: slanted flat twists gathered into a low bun. The style felt effortless yet put-together, chic without trying too hard. Years later, I understand why this particular combination resonates so deeply. A low bun is simple, charming, and great for any occasion.
The protective benefits make this one of my most recommended styles. Flat twists keep your strands tucked and secure, helping to reduce hair damage and breakage. By gathering them into a low bun at the nape, you’re protecting the most fragile parts of your hair while maintaining a polished appearance. Equally, the low maintenance aspect appeals to clients juggling demanding schedules. Once installed, these styles require minimal daily fussing.
How to Create the Perfect Low Bun
I love teaching this technique because it truly takes less than 5 minutes once you’ve practiced. Start with freshly washed, damp hair. Create slanted flat twists starting from your hairline, angling them diagonally toward the back rather than going straight. The slanted pattern adds visual interest.
Work in small, even sections for tighter, more uniform twists. Once you reach the nape, gather all your flat twists together. Wrap them around themselves to form the bun base, then secure with bobby pins. The beauty of this approach is that no extensions are needed, making it accessible for anyone wanting a quick protective option.
Who This Style Works Best For
This look works beautifully across various hair lengths and textures. I recommend it particularly for professionals seeking a neat appearance that transitions seamlessly from office meetings to evening events. The low positioning feels less formal than a high bun while maintaining sophistication.
Keeping It Fresh Throughout the Week
Here’s where proper maintenance becomes crucial. You can typically get 1-4 weeks out of your flat twists, depending on the size and style. For instance, I spray my twists with a leave-in conditioner every couple of days right before sleep, then seal with nourishing oils or hair butter. This nighttime routine keeps everything hydrated without causing frizz.
Accordingly, cover your hair at night with a silk or satin scarf to preserve the style and prevent frizz. Daily hydration with a moisturizing leave-in conditioner maintains the health of your scalp and twists, keeping everything looking fresh throughout the week.
Feed-In Flat Twists with Extensions

Adding Length and Volume
Extensions changed everything for my clients who dreamed of fuller, longer flat twist updos but didn’t want to wait years for growth. The frustration I heard most often at my New York salon was, “I love these styles, but my hair just isn’t long enough yet.” That’s when I started incorporating feed-in techniques into my flat twist work, and the transformations were stunning.
With extensions, you can create a piled-up collection of twists that’s gorgeous but also fun. The best part? You don’t have to wait until your hair grows very long. A thick and full bun is accessible and easy to assemble, making this technique perfect for special occasions or anyone wanting that dramatic updo effect right now.
Feed-in twists have become one of the season’s most requested looks, and I understand why. The method provides weeks of wear and extra inches while maintaining low tension at your roots. Your edges can breathe, which matters tremendously for long-term hair health. I’ve watched too many clients deal with thinning hairlines from constantly tight styles, so I prioritize techniques that protect rather than damage.
My Technique for Seamless Feed-Ins
Start by twisting your natural hair close to your scalp, then gradually feed in extension hair as you work backward. For the most natural-looking result, I install extensions specifically at the crown and front sections to create a plentiful updo. The back sections can be twisted tightly and symmetrically with your natural hair, while the added length goes where it creates maximum impact.
The key is introducing extension hair gradually rather than all at once. This creates that seamless blend where nobody can tell where your hair ends and the extensions begin. Once all sections are complete, gather everything into a large braided bun. The strands of attached hair can be coiled to create an intricate look that works beautifully for both natural and relaxed hair textures.
Best Extensions to Use
Texture matching makes or breaks this style. For coily or thick natural hair, kinky or coily textures like Marley hair are ideal. They blend effortlessly and give that soft, fluffy finish. If you want sleeker, more uniform twists, yaki textures mimic stretched or blow-dried natural hair and create a polished look.
The synthetic versus human hair debate comes down to priorities. Synthetic extensions are more affordable and hold their shape well, but human hair feels softer and can be reused. Correspondingly, pre-stretched extensions make installation easier, save time, and reduce tension at the ends. I always keep pre-stretched options on hand because they genuinely simplify the process.
Flat Twist Halo Braid

Creating This Angelic Look
Halo twists earned their name for good reason. The style creates an angelic, sophisticated appearance that I find myself reaching for whenever I want elegance without excessive effort. These are essentially large flat twists on either side of your head, and the technique is surprisingly straightforward.
Start with your tools: a rat tail comb for parting, detangling brush, bobby pins, and a boar bristle brush for smoothing edges. As you create each twist, stay close to your hairline so the twists naturally frame your face. This placement is what gives the halo its signature crown-like effect. The style works beautifully on transitioning, natural, relaxed, or straight hair, making it accessible regardless of your hair journey.
Styling Tips for a Polished Finish
Keep your twists large rather than small for that classic halo appearance. I learned this watching clients at my grandmother’s Charleston salon request this exact look for Sunday services. The larger sections create that elegant, uncluttered silhouette. Use your boar bristle brush to smooth any flyaways along your hairline before securing everything with bobby pins.
You can dress this style up with hair accessories or wear it as is. Particularly for formal events, adding decorative pins or small hair cuffs elevates the look without overwhelming it.
When I Recommend This Style
The versatility makes this one of my most recommended options. I’ve seen it work equally well at office meetings, during workouts, on date nights, and at formal affairs. This protective style tucks away your ends, reducing exposure to environmental damage while requiring minimal manipulation after installation.
In light of summer heat, I especially recommend halo twists. Hydration becomes essential during warmer months, and this style keeps your hair protected while your scalp remains accessible for moisture application.
Making It Last
Accordingly, your bedtime routine matters tremendously. Cover your halo braid with a satin or silk bonnet or scarf before sleep. This reduces friction and prevents unraveling overnight. Each morning, lightly spritz with a hydrating mist made from water and leave-in conditioner, then gently reshape any sections that shifted during sleep.
Throughout the day, avoid excessive manipulation. The more you touch and adjust your halo, the faster it loosens and loses shape.
Flat Twist Mohawk (Frohawk)

Bold and Beautiful Styling
A client walked into my New York salon one morning asking for something that would make her former colleagues do a double-take at an upcoming reunion. That’s when I introduced her to the flat twist mohawk, and the transformation was exactly what she needed. This edgy style turns heads while maintaining all the protective benefits of traditional flat twists.
What makes the frohawk special is how flat twists can shift the entire vibe from edgy to chic in minutes. The contrast between sleek, twisted sides and voluminous center creates striking dimension. I’ve styled this look for clients heading to music festivals, creative professionals wanting to express boldness, and women simply ready for change. Accordingly, the versatility spans from ultra-polished to deliberately textured, depending on your preference.
How I Create This Edgy Look
My technique varies based on hair texture and desired longevity. For clients with fine hair, I discovered that braiding the sides instead of flat twisting prevents rolling and loosening over time. This adaptation extends wear up to 4 weeks because the braids grip softer textures more securely.
Start by sectioning your hair down the center, leaving a strip for the mohawk portion. Create flat twists or small braids along both sides, working from front to back. The center can be styled multiple ways: gathered into mini ponytails, secured with bobby pins for volume, or fastened with decorative hair combs for quick styling. Bobby pins strategically placed keep everything secured, while your choice of moisturizer maintains softness throughout wear.
Best Face Shapes for This Style
The frohawk particularly complements larger foreheads when paired with fringe-filled styling. The height draws eyes upward and creates balance, making it flattering across various face shapes.
Maintenance and Longevity
Moisture remains absolutely essential for this style. With proper care, your flat twist mohawk lasts up to 3 weeks. Apply leave-in conditioner focusing on your scalp and the twisted sections, then seal with oil before bed each night.
Short Flat Twist Hairstyles

Styling Options for Shorter Hair
Shorter hair doesn’t limit your flat twist options one bit. Flat twists can be styled into updos, low buns, pigtails, or high puffs, proving that length doesn’t dictate versatility. You can leave them loose for a relaxed vibe or pull them into an elegant knot.
Take the case of a high puff: instead of the classic slicked-back approach, add flat twists in the front section. This creates dimension while keeping everything off your face. Chunky flat twists that run from a center parting, behind your ears, and down to your nape frame your face beautifully.
My Favorite Short Flat Twist Looks
My favorite short hair option involves creating two twists that run along your face and end with mini-puffs. This keeps volume you love while maintaining control over the front sections. Adding beads creates a decorative touch and weighs down the twists, keeping them aligned.
For clients wanting neat, symmetrical looks, I create one-size twists parted with geometrical precision that run front to back, culminating in a low twisted bun. This adorable hairstyle features flat twists starting from the front, running straight back, and ending in two sleek low buns. It’s a great protective style that keeps hair protected from unnecessary damage.
Products That Work Best
For shorter hair, use styling gel or cream with strong hold to keep twists neat and secure. Start with a sulfate-free moisturizing shampoo, follow with hydrating conditioner, then apply leave-in conditioner for extra moisture. Layer a curl defining cream for frizz-free twists, finish with hair oil or serum to seal in moisture, and use edge control along your hairline for polish.
Tips for Maximizing Your Length
Add braiding hair to extend length or add thickness. For mixed-length sections, work in smaller sections to blend shorter pieces with longer parts seamlessly. Flat twist outs save time on styling, particularly for shorter hair.
Flat Twist Out Style

Transforming Your Twists into Curls
One morning at the Sassoon Academy, I watched an instructor unravel her flat twists and the transformation left me speechless. What had been sleek, structured twists became bouncy, defined curls with volume that seemed to defy gravity. That’s when I discovered flat twist outs create one of the most beloved looks in natural hair styling.
A flat twist out gives you defined roots and more elongation than regular twist outs. The flat twisting at your roots maintains a consistent pattern and prevents puffiness as everything dries. What makes this style special is the control you gain over your curl definition without heat or harsh products.
My Step-by-Step Twist Out Process
Start on stretched hair, particularly if you have 4c texture prone to severe retraction. I learned this after dealing with tangled disasters from twisting soaking wet coils. Stretch your hair through banding or using the tension method with a blow-dryer and heat protectant.
Thoroughly detangle each section with a wide-tooth comb, followed by a small-tooth comb for smoothness. Wind the individual strands before twisting them around one another. This maintains strand grouping while unraveling and helps withstand humidity. Use perm rods on the ends to prevent definition loss and create a polished look.
Achieving Maximum Definition
Drying determines everything. Air-dry overnight for soft finish, or use a hooded dryer on low heat if time is tight. Wait until your hair is completely dry before unraveling to avoid frizz. Apply light oil to your fingertips, then gently unwind each twist from bottom up. Separate twists into smaller sections for added volume, though more separation can lead to frizz.
How Long to Keep Twists In
Leave twists in at least 4-6 hours or overnight for defined curls. Longer wear gives more hold and longevity. Your flat twists can last up to three weeks before loosening. Accordingly, protect your twist out at night by gathering hair into a loose pineapple and covering with a satin scarf.
Half-Up Half-Down Flat Twists

Versatility at Its Best
During my years styling hair, half-up half-down flat twists became my answer when clients couldn’t decide between wearing their hair up or down. This super-versatile look can be customized to fit anyone and any occasion. What makes it brilliant is how it keeps hair off your face while showcasing your length, striking that balance between polish and ease.
The style works beautifully across all hair types and lengths, making it accessible whether you’re working with relaxed, natural, or transitioning hair. You can dress it up with accessories or keep it simple. Equally, the look transitions seamlessly from professional settings to formal weddings.
How I Create This Balanced Look
Part your hair roughly from ear to ear and secure the back section. Depending on your face shape, create an even number of flat twists with a center or side part, or an odd number with one twist up the middle. The front twists pull hair away from your face while the back flows freely. This quick styling takes around 5 minutes once you’ve practiced.
Perfect Occasions for This Style
I recommend this for professional meetings where you need polish without severity, casual outings requiring effortless style, and formal events needing sophisticated yet approachable looks.
Flat Twists with Loose Ends

Letting Your Natural Texture Shine
At my grandmother’s Charleston salon, clients often requested flat twists but wanted their beautiful curl pattern visible at the ends. This style became my answer for showcasing natural texture while maintaining scalp protection.
Styling Technique I Use
After flat twisting sections close to your scalp, you have several finishing options for loose ends. Simply close the look by two-strand twisting each row to the tips. For instance, you can coil the free hair into tiny Bantu knots for a polished finish. Accordingly, rubber bands work if you want to let your ends fly free, or create a sideways fishtail using all loose ends for something different.
When flat twisting, stick with the same sections throughout. Don’t borrow hair from one section to another. This prevents frizz during takedown and maintains clean definition.
Best for Showcasing Curl Pattern
Leaving ends loose highlights your natural curl pattern beautifully. The contrast between structured twists and free-flowing curls creates dimension.
Preventing Frizz and Maintaining Moisture
Trim damaged ends regularly, as they make twists look frizzy. After moisturizing, apply light oil like coconut to the ends every couple of days to seal them. Your hair needs proper hydration for definition, so keep those loose ends moisturized without becoming heavy-handed with products.
Flat Twist Updo Hairstyles with Accessories

Elevating Your Style with Beads and Cuffs
Accessories transformed how I approached flat twist updo hairstyles. Beads are a beautiful way to add flair to your flat twist hairstyles for black women. Between the design possibilities and accessory options, it’s virtually impossible for this look to fall flat. Thread beads and shells onto the ends of your twists to add a playful and beachy vibe. Mix and match bead colors and shapes to create a unique pattern that expresses your personality.
Hair rings and cuffs are perfect for adding a touch of boho chic to your flat twists. Slide them onto individual twists to create an eye-catching and trendy look. These chunky flat twists can be criss-crossed and tucked with gold cuffs for a simple, stylish and protective look. Available in various styles and metals, they offer versatility for different occasions.
How I Choose and Place Accessories
Charms and pendants can add a personal and meaningful touch to your flat twists. Attach small charms or pendants that resonate with you to your hair. This can be a great conversation starter and a way to express your individuality.
My Favorite Accessory Combinations
Add flair with beads, cuffs, coils, or vibrant thread. Accessories not only elevate your look but also make your style personal and unique.
Two-Strand Twist and Flat Twist Combo

Mixing Techniques for Dimension
Combining both methods wasn’t something I planned initially. A bride requested flat twists for neatness but wanted her natural curl pattern visible throughout. That’s when I discovered how section off a small portion of hair at the front and twist it flat against the scalp, merging seamlessly into two-strand twists. This adds dimension and visual interest to your overall look.
How to Blend Both Styles Seamlessly
The technique is straightforward once you understand the transition point. Start with flat twists along your hairline or specific sections where you want sleekness. As you move toward areas where volume matters, gradually shift into two-strand twists. The key is maintaining consistent tension so the change appears intentional rather than accidental.
Creating Visual Interest
Don’t limit yourself to one direction. Try alternating the twisting direction on different sections of hair for a more dynamic effect. I’ve created modern styles by pairing two-strand twists with flat twists to achieve asymmetrical looks. In fact, flat twists around the perimeter of your head with a curly center creates striking contrast.
When I Use This Combination
Accordingly, I reach for this combo when clients want both structure and movement. The flat twisted sections provide control while two-strand portions offer body and dimension.
Conclusion
Flat twists have proven their worth time and again in my styling career, offering endless possibilities regardless of your hair length or texture. From elegant updos to playful twist outs, these 12 styles demonstrate just how versatile protective styling can be. Not every look will become your signature style, and that’s perfectly fine. Experiment with different techniques until you discover what makes you feel confident and beautiful. What matters most is finding styles that protect your hair while expressing your personality. Start with one technique that caught your eye, practice the steps, and watch your skills grow. Your hair journey is uniquely yours, so enjoy every twist along the way.