Long hair at the beach can feel like a battle against wind, salt, and humidity. However, I’ve learned that beach hairstyles for long hair can actually be your best accessory when done right. The beach is the perfect place to try out new hairstyle trends and be more playful with your look. From easy beach hairstyles for long hair like messy buns to cute beach hairstyles for long hair such as braided crowns, I’m sharing 12 styles that keep you looking effortless. Equally important, I’ll show you how to protect your beach hair while rocking these long hairstyles for the beach and braid hairstyles for the beach.
Effortless Beach Waves
What Makes Beach Waves Perfect for Long Hair
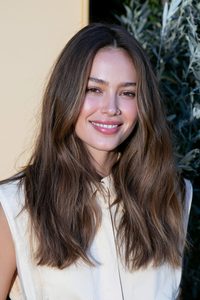
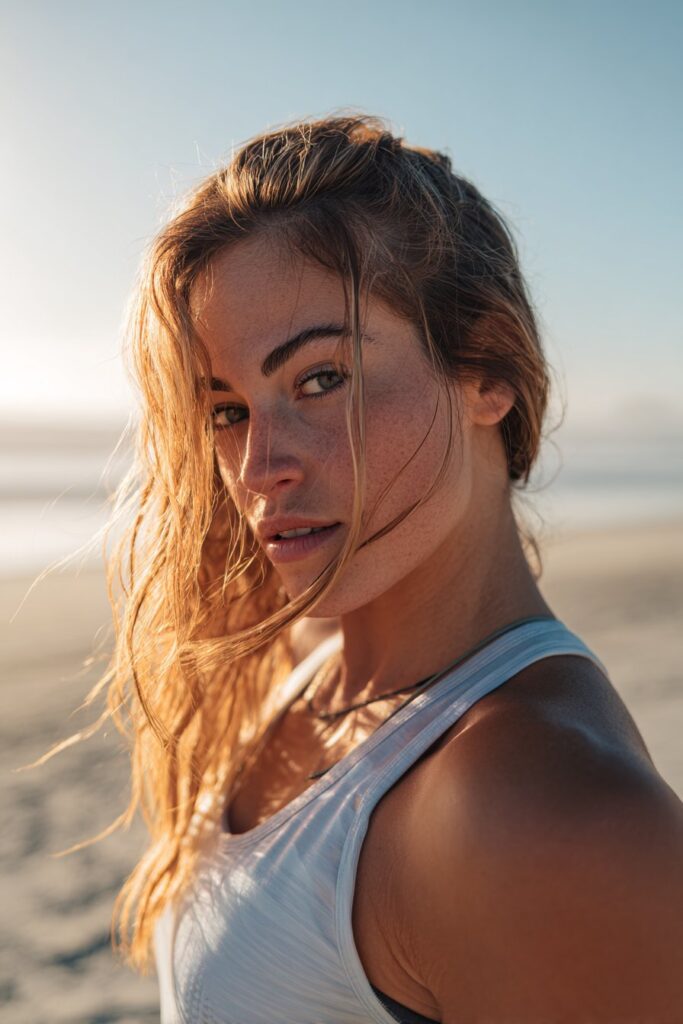
Beach waves have become one of my most requested styles, and for good reason. They showcase the natural beauty of your hair while adding body, movement, and texture. What I love most is their versatility. I’ve styled beach waves for clients heading to casual weekend brunches and others preparing for evening events. The relaxed look works beautifully with both scenarios.
For those with long hair, beach waves add dimension that might otherwise get lost in the length. The loose, undone texture creates visual interest without requiring precision or perfection. In fact, the more imperfect and lived-in they look, the better they turn out.
How to Create Beach Waves
I use a 1-inch curling iron for creating beach waves on long hair. The technique is straightforward but requires one specific step that transforms regular curls into authentic beach waves. After sectioning your hair, clamp the iron halfway down each strand and twist away from your face, winding toward the scalp. Hold for about five seconds, then loosen slightly and wind in a few more inches, leaving the ends out.
Here’s the game-changing step: run a flat iron over just the bottom two inches of your hair to straighten the ends. This detail prevents the style from looking too polished or overly curled.
Different hair types need slightly different approaches. For fine hair that struggles to hold curl, I start with a volumizing mousse on damp hair before blow-drying. When blow-drying fine hair, avoid stretching it too much, as this makes it harder to retain waves later. Thicker hair benefits from spending extra time smoothing during the blow-dry to prevent fuzziness. With coiled curly hair, use a larger barrel curling iron after ensuring the hair is completely smooth.
Styling Tips from My Experience
Let your curls cool completely before touching them. This step sets the wave pattern and makes the style last all day. I know it feels counterintuitive, but brushing through your freshly curled hair is what creates that authentic beach wave look. The brushing blends individual curls into soft, natural waves that appear effortless.
For clients whose hair doesn’t hold curl well, I apply texture spray before curling and use hairspray on each section immediately after curling. Salt-free formulas work beautifully because they add texture without the crunchiness or dryness.
Best Products to Use
Heat protectant is non-negotiable. Apply it before blow-drying and again before heat styling. For texture and volume, salt sprays applied to damp hair work wonders when scrunched in. I prefer salt-free options that won’t dry out your strands.
Texturizing mousses add structure and definition without weighing down long hair. A golf ball-sized amount distributed from roots to ends provides lightweight body. Finish with a dry texturizing spray, which gives that salty, natural look. Use your fingers to break apart the waves while applying for a looser, more natural finish.
Classic Fishtail Braid
Why Fishtail Braids Work at the Beach
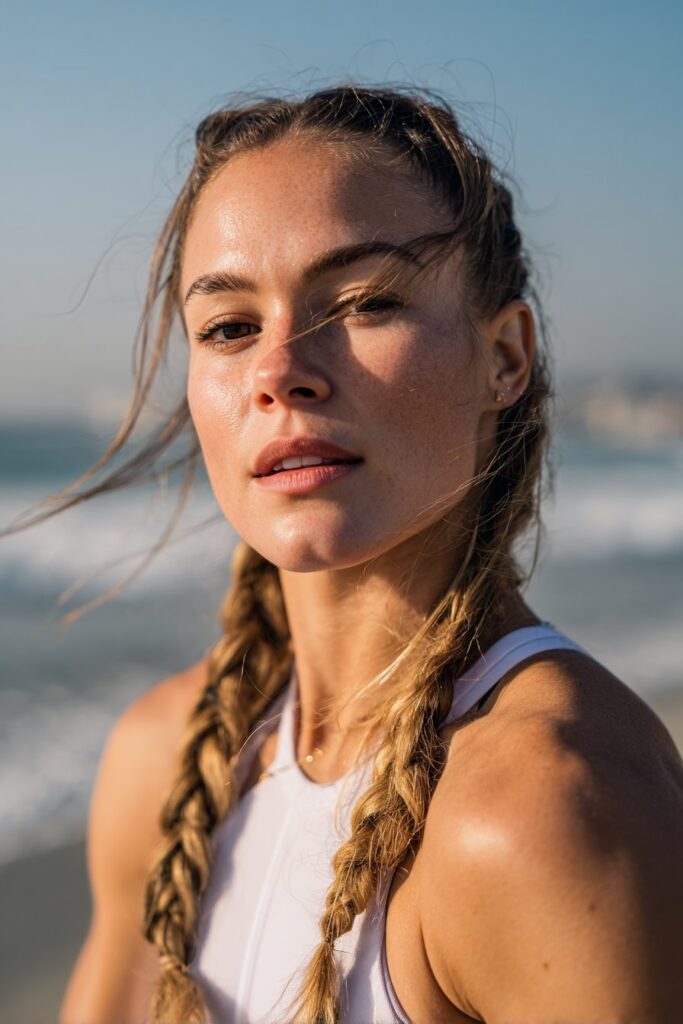
Fishtail braids have this intricate skeletal pattern that adds a “wow” factor to any beach look. What seems complex is actually easier than it appears. I’ve taught countless clients this technique, and they’re always surprised at how simple it is once they understand the basic movement.
The fishtail braid works with smaller sections of hair taken from an evenly-parted mane as you weave your braid. This creates overlapping fish scales that look detailed and well thought-out. At the beach, this style offers something regular braids can’t: it holds well, looks effortless, and actually thrives in the conditions that would ruin other styles.
Beach braid hairstyles like the fishtail are particularly suited to long hair. Salt air and humidity add natural texture that makes the braid look even better as the day goes on. I wear this style myself on beach days because it keeps thick hair away from your neck and shoulders, bringing a cool and comfortable feeling.
Step-by-Step Styling Guide
Start by splitting your hair vertically into two even segments. If you’re new to fishtail braiding, I recommend creating a side ponytail so you can see your braid more easily in the mirror. This makes the learning process less frustrating.
Grab a small section of hair from the outside of the right section. The smaller the section, the tighter your fishtail braid will be. Cross it over to the inside left at the center of your braid. Take a two-inch segment from the outside left section and cross it over to the inside right. Continue this crisscrossing pattern, alternating sides, until you reach the ends.
Secure with a clear elastic or gently tease the end with a fine-tooth comb to prevent unraveling. Specifically, pancaking adds extra volume to your braid and helps it look effortlessly undone. Pinch or pull the sides just enough to make it appear fuller without unraveling.
Pro Tips for Long-Lasting Braids
Second or third-day hair is ideal when learning this technique. Unwashed hair has extra grip that helps keep it from unraveling throughout the day.
For just-washed hair, apply a texturizer before braiding. Dry shampoo works beautifully as a prep step because it adds volume and texture. Mist a bit through random scalp sections to create a matte effect and extra staying power. Finish with working or finishing hold hairspray.
When to Wear This Style
This imperfect messy quality lends itself to relaxed summer outings. I love fishtail braids for casual beach days, outdoor weddings, or any situation where you want that bohemian beach vibe. For more formal events, dress it up with a headband or fresh flowers.
Messy High Bun
The Appeal of the Messy Bun
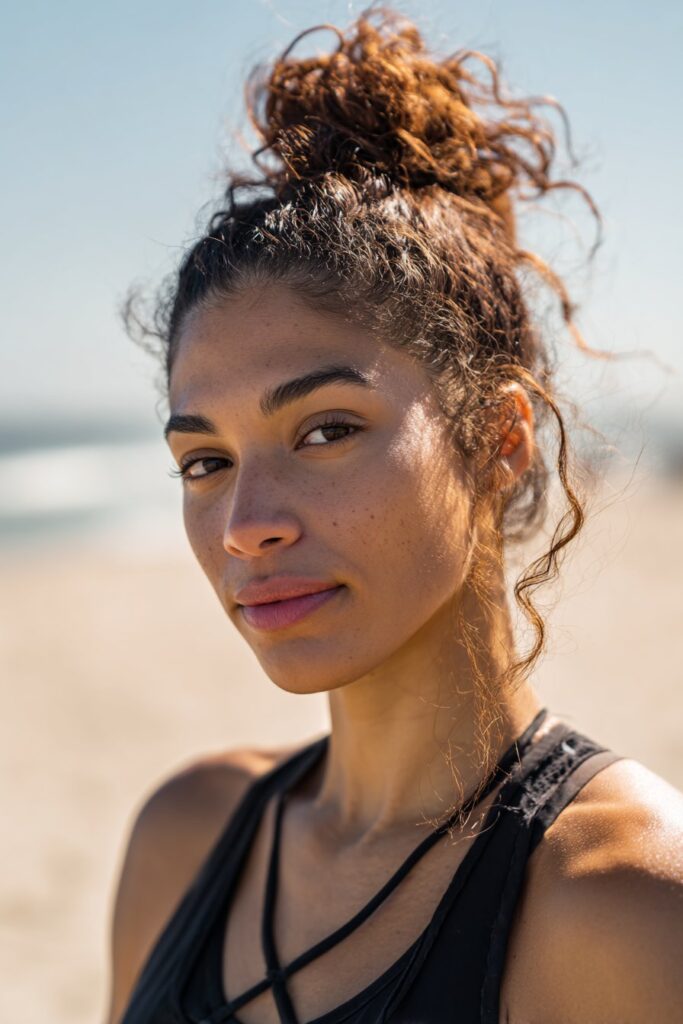
I remember teaching a bridal workshop where half the attendees asked about messy buns. They loved that this style works as beautifully for casual beach days as it does for dressed-up moments. The messy bun for long hair delivers a relaxed, undone vibe while keeping hair completely off your face and neck. At the beach, this becomes your savior against wind, salt spray, and humidity.
What makes this style so appealing is its low-maintenance nature. The messy bun matches the effortless beauty trend that clients constantly request. Besides adding natural volume and texture to long lengths, it’s perfect for quick styling without heat or tools. When I wear this style myself on beach days, I appreciate how it keeps thick hair away from shoulders, bringing a cool and comfortable feeling.
How to Style a Beach-Ready Bun
Here’s what I’ve learned from styling hundreds of messy buns: second or third-day hair works better than freshly washed hair. The natural oils help the bun hold its shape throughout the day. If your hair is clean, apply dry shampoo or texturizing spray before starting.
Brush your hair thoroughly to remove tangles[141]. Flip your head upside down and gather everything into a high ponytail at the crown. This technique helps you achieve the height you want without the bun sagging later. Pull a few strands loose at the front for that soft, messy, face-framing look.
Twist the ponytail and wrap it around the base to form your bun. Keep the wraps loose to maintain natural texture. Secure with bobby pins, making sure the bun appears intentionally messy. Pull at the bun gently to loosen it up and create more volume.
Making It Last All Day
Light to medium hold hairspray keeps the messy look intact without stiffness. Go easy on product though, since too much makes it hard to remove later. For hair that doesn’t stay put, use silk-lined scrunchies or thinner hair ties. Bobby pins become equally important for securing loose pieces.
Accessorizing Your Bun
Scrunchies, headbands, clips, and decorative pins add personality to your messy bun. A thick hair band holds all your hair securely, while claw clips can secure loose pieces or add extra flair. These accessories elevate the style from basic to beach-chic instantly.
Braided Crown
Why I Love Braided Crowns
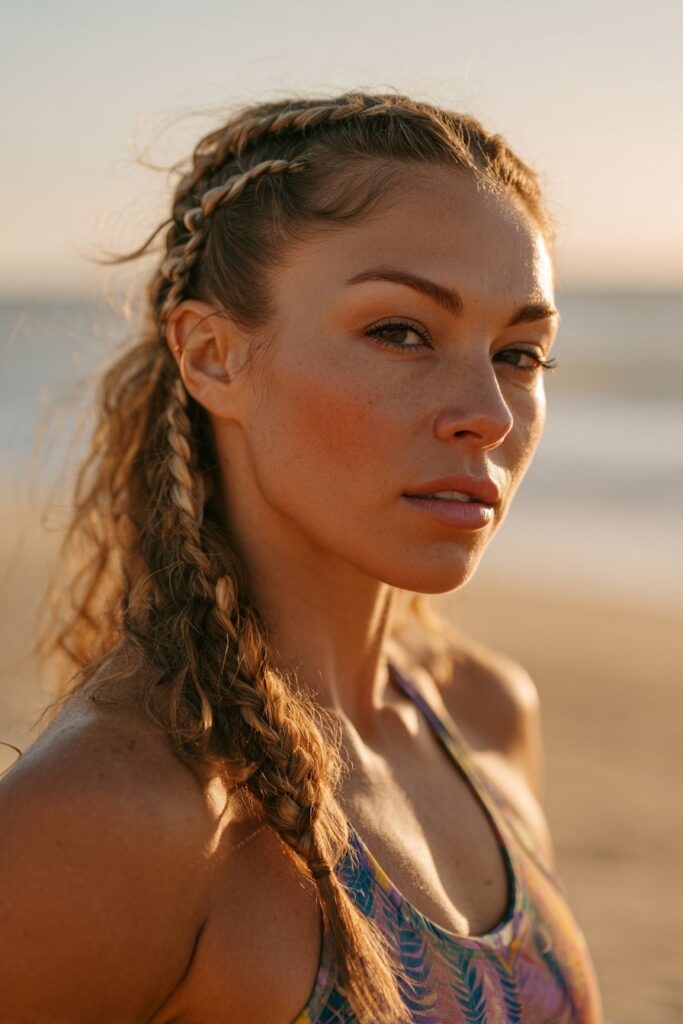
The first time I created a braided crown, I was preparing a client for an outdoor ceremony by the coast. When she saw herself in the mirror, she teared up. That moment showed me how this style carries something special that other beach hairstyles for long hair simply can’t replicate. The classic braided crown is a timeless and elegant hairstyle that adds a touch of romance to any look. The delicate braids frame the face and intertwine like a crown, exuding effortless beauty and elegance.
Crown braids are elegant hairstyles that work on all hair types and textures. I’ve styled them on fine, straight hair and thick, curly hair with equal success. Consequently, whether you need a polished look or something relaxed for the beach, crown braids adapt beautifully while looking spectacular.
Creating the Perfect Crown Braid
Start by parting your hair to one side. For instance, if you’re right-handed, part your hair to the right side. This makes starting your crown braid easier since you’re working with your dominant hand. Brush out any tangles before beginning.
Grab a section about one-inch wide starting at your hairline and separate it into three equally-sized pieces. I use a Dutch braid technique because it creates the illusion of a braid that really pops out. Anchor your braid as you would a traditional three-strand braid, then start Dutch braiding down the side of your head, picking up more hair and adding it to each strand as you continue.
When you near the nape of your neck, slowly start to curve your Dutch braid around your head. As you reach the front of your head on the opposite side, you’ll run out of hair to add. Simply continue with a traditional three-strand braid down the length of your hair and secure with a clear elastic. Tuck the ends into the braid and bobby pin it in place.
Best Occasions for This Style
This braided crown captures the essence of sophistication and seaside glamor. I wear it for beach weddings, sunset dinners, and even casual afternoon gatherings when I want to feel put-together without looking overdone.
Tips for Securing Long Hair
Wash your hair 2-3 days before getting a crown braid to help it stay in place. If your hair is freshly washed and slippery, use dry shampoo to create hold and work with textures. Additionally, avoid using oversized rubber bands since they draw attention and ruin the overall look. Do not use bobby pins to hold thick parts of the hair in place, as they frequently twist and bend thick hair. Use coconut or almond oil to keep the hair light and hydrated, avoiding moisturizers with mineral or lemon oil as they can cause scalp buildup and irritation.
Sleek High Ponytail
The Versatility of High Ponytails
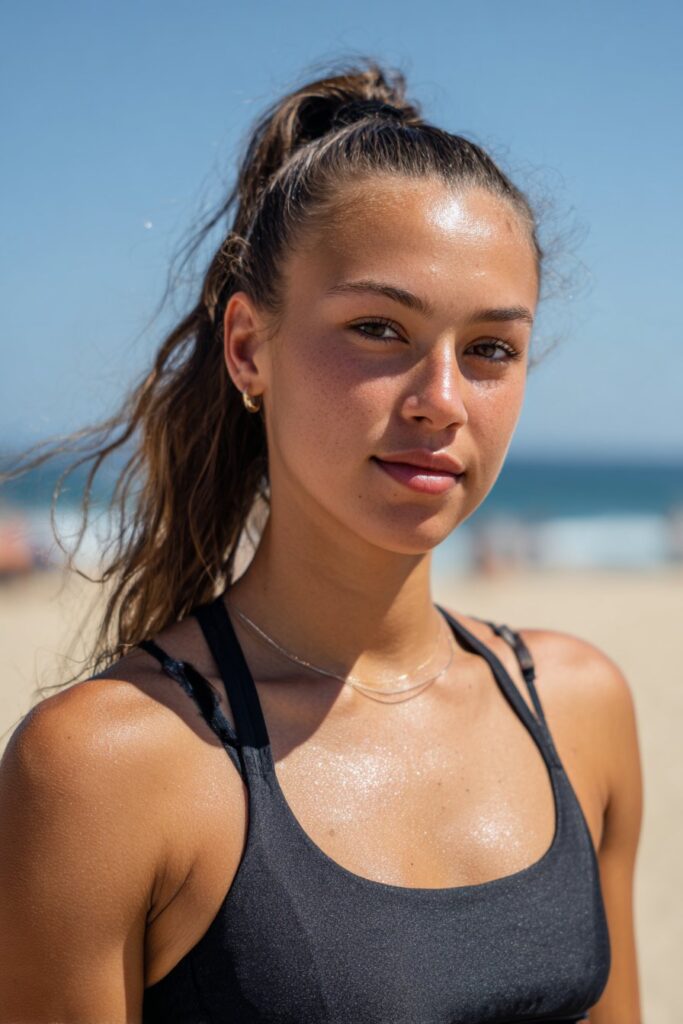
There’s something undeniably powerful about pulling your hair back into a sleek high ponytail. Few hairstyles exude as much confidence as the slicked-back ponytail. I’ve worn this style countless times when I needed to feel polished and put-together, whether heading to a beachside dinner or spending a casual afternoon by the water. The ultra-sleek hairstyle takes you from day to night without looking overdone, and it can be styled in mere minutes.
What makes this one of my favorite cute beach hairstyles for long hair is its forgiving nature. A slicked-back appearance actually works great on third-day hair. Accordingly, when your hair has natural oils built up, you get that sharp, smooth finish more easily than with freshly washed strands. High ponytails work particularly well if you have a long face, while those with rounder faces might prefer keeping it lower with added texture.
Achieving the Perfect Sleek Look
I learned a game-changing technique from working with different hair textures: subdivide your hair into three large sections instead of gathering everything at once. Start by sectioning around the face, then divide the remaining hair horizontally at the crown. This gives you better control and helps you direct exactly how high or low you want the base to land.
Use a boar bristle brush with lots of tension and your preferred hold product to keep roots tight. The boar bristle brush is non-negotiable for this style. Mist hairspray onto the brush to control flyaways as you work. Once you’ve secured the base with an elastic, here’s my favorite trick: work a small amount of texture paste or a pomade stick onto edges and flyaways. This keeps every hair in place without looking stiff.
Adding Volume and Texture
For volume that lasts, try crisscrossing two bobby pins at the base beneath your ponytail. This simple step lifts the hair and creates the appearance of fullness. Another technique involves creating two ponytails stacked on top of each other, which adds both length and body versus the traditional single ponytail method. Teasing the ponytail itself with a brush or comb provides extra dimension.
Protecting Your Hair from Sun Damage
Soft updos like high ponytails protect hair lengths and limit friction from sun exposure. UV rays damage your hair’s protein structure, leading to dryness and breakage. By keeping your hair secured in a ponytail, you reduce direct sun exposure while keeping strands protected. This makes the sleek ponytail not just stylish but functional for beach days.
Dutch Braid Pigtails
Why Dutch Braids Are Beach Essentials
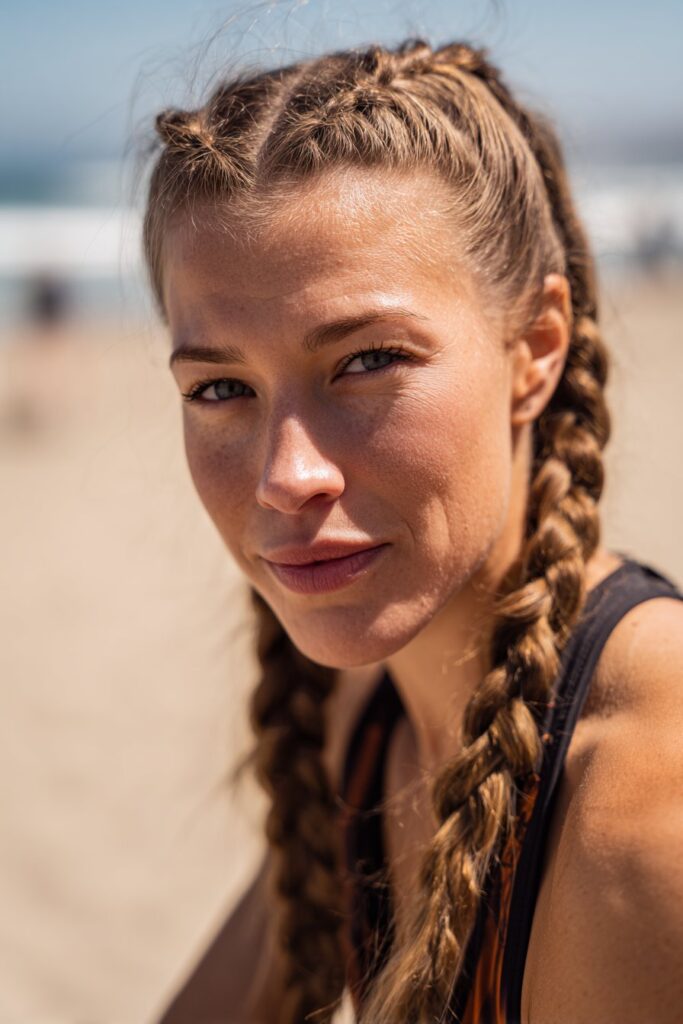
Dutch braid pigtails have followed me from my early styling days in New York right through to my current work in Los Angeles. Often called boxer braids, these pigtails keep hair out of your face all day. What makes them beach essentials is their remarkable versatility. You can wear the same style from the gym to a meeting, and then out for the night.
The Dutch technique involves crossing strands underneath rather than over, resulting in a braid that appears to sit on top of your hair rather than blending into it. This creates a raised, dimensional effect that stands out beautifully. For the beach specifically, these braid hairstyles for the beach work in your favor as humidity and salt air actually enhance the texture.
Braiding Technique for Long Hair
Start by prepping your hair with gel or pomade to help the braids maintain their hold. Part your hair down the middle and create two even sections on each side of your head. Work with one section at a time, splitting your hair into three even segments.
Beginning at your hairline, take three small pieces and weave each piece under rather than over. This is the opposite of a French braid. Continue this pattern, adding more hair from the root each time you weave a new section. Once you reach the nape of your neck, switch to a regular three-strand braid. Secure with a clear elastic. Pancake each braid to make them appear full and voluminous.
Styling Variations to Try
Instead of braiding all the way to the ends, leave your pigtails loose. Backcomb each one and add texturizing spray to ensure they look particularly voluminous. For a festival-ready look, flip your head over, braid from the nape to the crown, then create a perfectly messy top knot on each side.
Keeping Your Braids Frizz-Free
Humidity causes your hair’s cuticle layer to swell, leading to raised surfaces along the hair shaft. Combat this by using anti-humidity hairspray that holds hair in place for 24 hours without residue or flaking. Use a satin or silk wrap overnight to reduce friction while you sleep. When waking up, gently smooth braids with a lightweight oil or serum if necessary.
Half-Up Top Knot
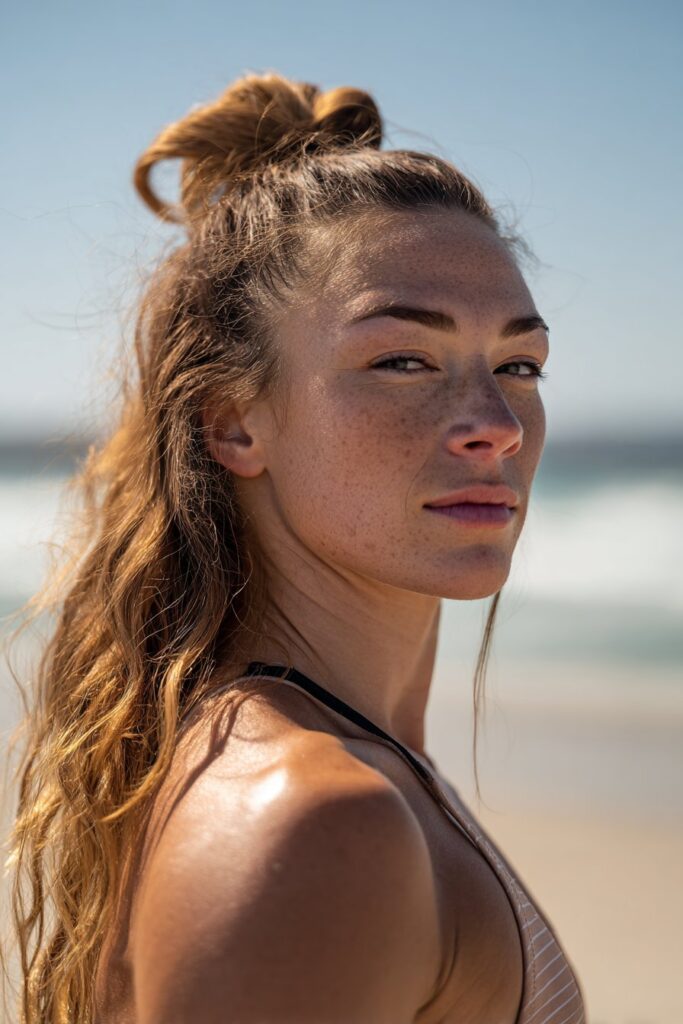
The Best of Both Worlds
During my years styling in Los Angeles, the half-up top knot has become one of my most-used styles. I wear it myself at least twice a week because it combines the best elements of wearing hair up and down simultaneously. This style is perfect for anyone who requires minimal effort, specifically an under 5-minute kind of hairstyle. What I love most is its versatility – it can be dressed up with a cute summer dress or dressed down and worn to the beach.
The half-up top knot works beautifully with curled hair, straight hair, or even 3-day post-shampoo hair. In fact, I call this style low-maintenance because once it’s up, you really don’t have to worry about it again for the entire day.
How to Create This Easy Style
Start by adding volume with dry shampoo, whether you have thin or thick hair. I quickly spray it directly onto roots for quick texture. Now section your hair from your temples in a crescent shape to create the perfect topknot. Don’t worry about it being super neat – the messier the better.
Sweep all sectioned hair into a high ponytail at the top of your head. If you have fine hair or want more body, tease the hair in the ponytail from root to tip. Simply twist your sectioned hair into a topknot and secure with a hair tie.
Face-Framing Tips
I like to slightly loosen the hair right at my scalp before wrapping the bun. This prevents that slicked-back appearance. Tug at the outside ends of your topknot to create a fuller, messier look. Pull a few pieces out at the front for that soft, face-framing effect.
Adding Beachy Texture
For the bottom portion, you can wear it straight or curled as you please. I love using beachy waves on the lower section to complement the top knot. Finish with your favorite finishing spray to ensure your topknot stays in place.
Low Twisted Bun
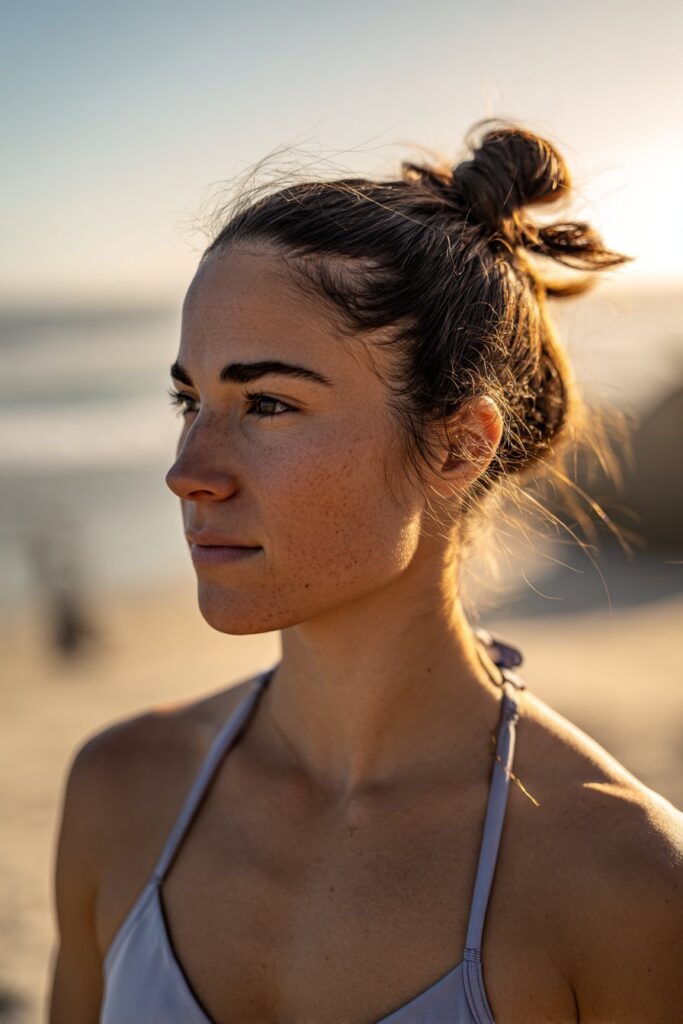
Elegant Yet Effortless
This beach bun twist hairstyle takes a simple bun and elevates it with a cute twist detail. What I appreciate most is how it blends classic French twist inspiration with modern, relaxed styling. The low bun at the back serves as your foundation, while the twist around it can be adjusted to suit your preferences and hair type. Whether you center part or side part your hair, this style adapts beautifully.
Creating a Secure Twisted Bun
For thick hair, I always put everything into a low ponytail first before creating the bun. This helps manage the weight, especially when your hair is wet from the ocean. Instead of traditional bobby pins, try spin pins. Each one does the work of around 20 bobby pins, making securing your bun much faster.
My Favorite Styling Trick
Fine hair often disappears into tiny buns, but here’s my solution: don’t twist too tight. Create more of a flat pancake style bun by doing a loose twist and pressing it up and down as you wrap around. This creates the illusion of a larger bun and gives the impression of having more hair.
Perfect for Windy Beach Days
Keep leave-in conditioner in your beach bag. Salt water dries out your strands, and the conditioner adds moisture back while making your hair easier to style.
Scarf-Wrapped Ponytail
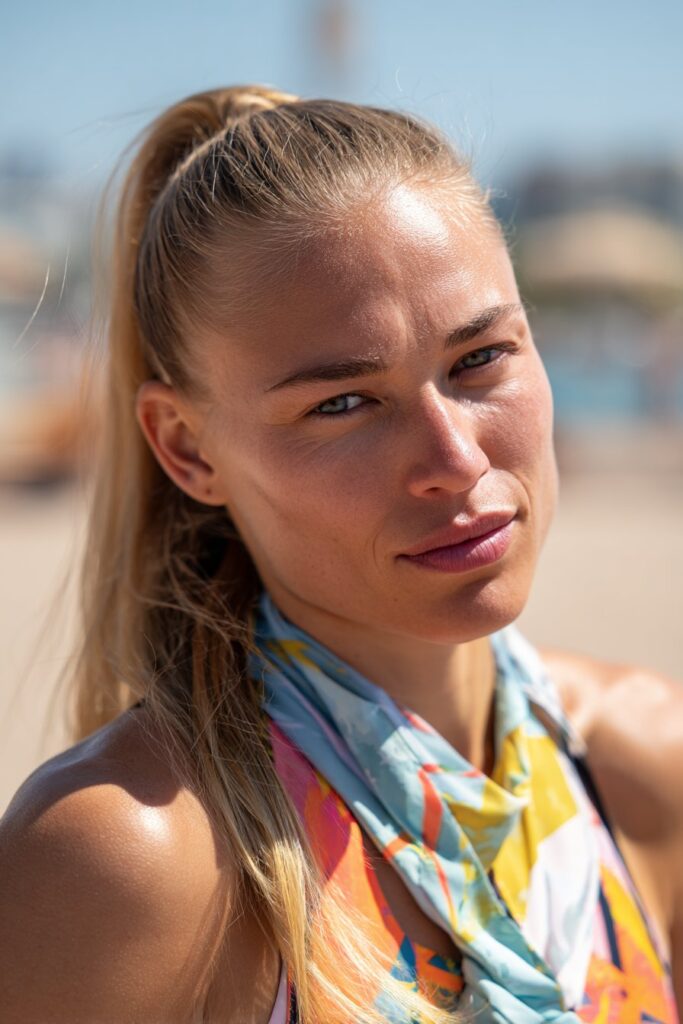
Adding Color and Protection
Scarves transform ordinary ponytails into statement pieces. Besides adding instant color to your look, they protect your hair from sun exposure and salt damage. I keep several in my beach bag because they’re versatile enough to wrap like a headband or tie around your handbag when not in use.
Choosing the Right Scarf
Silk and satin scarves work beautifully because they’re gentle on your hair and won’t cause damage or breakage. Square scarves around 70×70 cm offer versatility, while long scarves around 150 cm work perfectly for braided styles. The fabric’s silky texture prevents friction while looking elegant.
How to Wrap and Secure
Pull your hair into a ponytail at your desired height. Fold a square scarf diagonally to create a triangle, then feed the ponytail through from the underside until half the scarf sits on each side. Tie a single knot around your ponytail, keeping both ends long. For fine-textured hair, use specific ponytail holders that grip better. Bobby pins at the bottom add extra security.
Styling Ideas for Different Looks
Try tying the scarf into a soft bow for elegance. Alternatively, let the ends cascade freely for relaxed bohemian vibes. For a romantic variation, section front pieces forward, wrap the scarf around back hair, then tie everything together.
Bubble Braid Ponytail
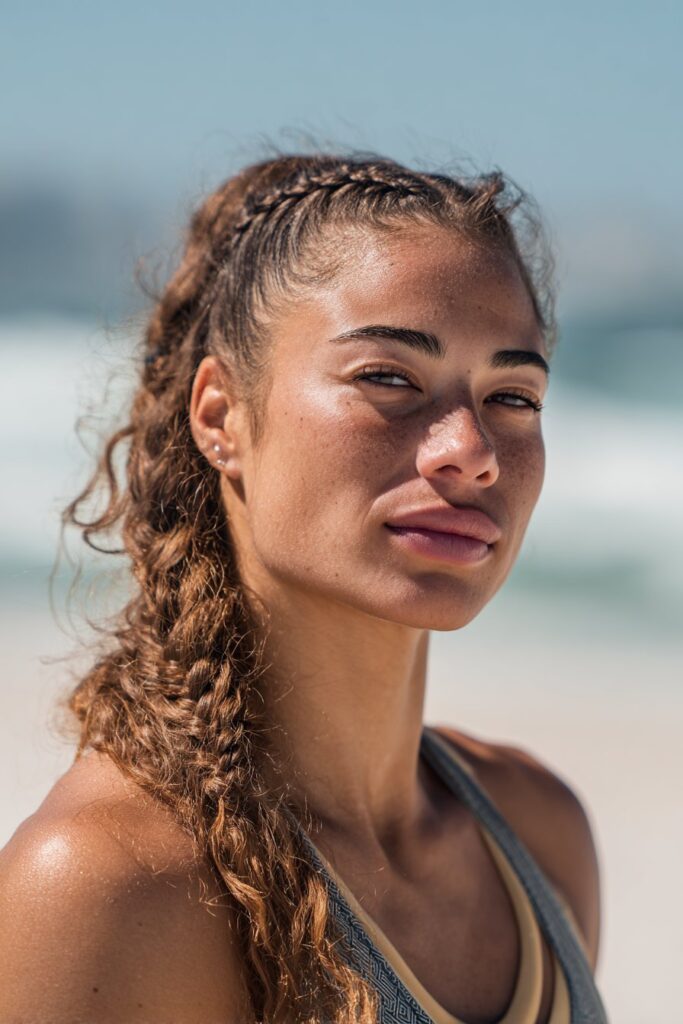
Fun and Playful Beach Style
Bubble braids are one of those styles that look impressively intricate but require zero actual braiding skills. This braid gives you volume on top of your hair, and the more you pull, the bigger the bubbles become. You decide the level of puffiness. What makes this particularly perfect as one of the easy beach hairstyles for long hair is how well it works with second or third-day hair. In fact, the more dry shampoo and product in your hair, the better because volume is what makes this ponytail shine.
Creating Perfect Bubbles
Pull your hair into a slick ponytail, either high or low. Move 2-3 inches down the pony and add a clear elastic to the ponytail. Gently pull or tease the hair between the two bands to create that bubble effect. Continue this process all the way down, leaving a few inches of tail at the end for a casual, modern look.
Making It Work for Long Hair
Long hair gives you more bubbles, making this style even more fun. You can customize bubble size by adjusting spacing between elastics. Tease each section for fuller bubbles.
Adding Accessories
Pop small bedazzled hair pins throughout your bubble ponytail for sparkle. Try temporary hair color spray on each bubble, or add a headband for instant impact.
Romantic Side Braid
Bohemian Beach Vibes
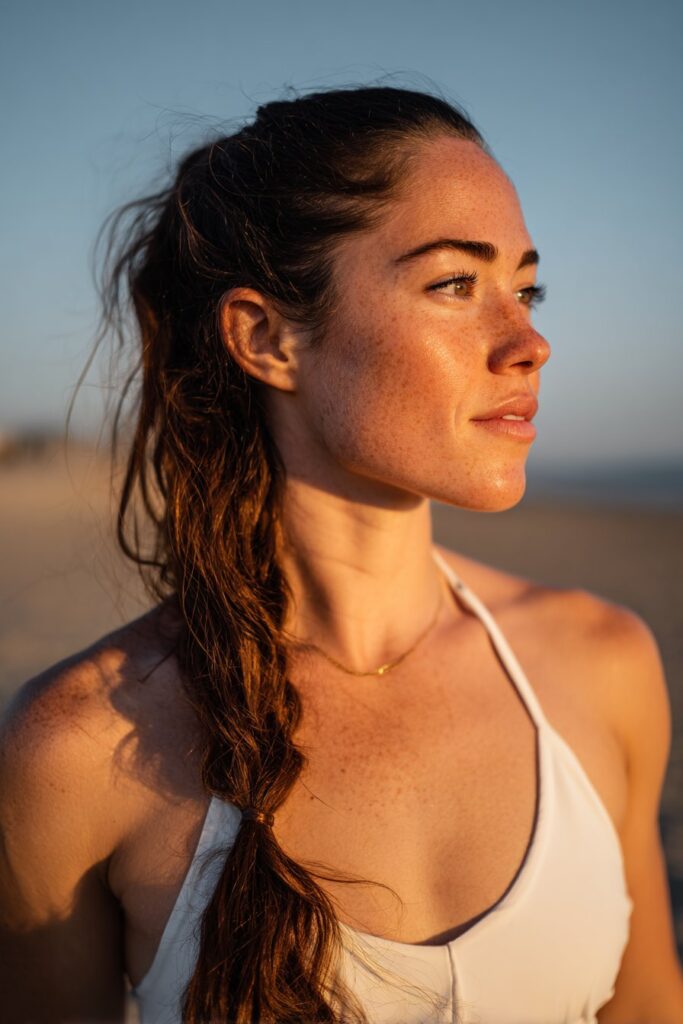
Side braids remind me of my early bridal work, when I styled countless brides seeking that soft, romantic look. This hairstyle is perfect for summertime and can be worn for many different types of occasions. The romantic side braid captures that effortless bohemian esthetic without trying too hard.
Loose vs. Tight Braiding
Loose braids are known for their relaxed and bohemian vibe, making them an excellent choice for casual, everyday wear. They allow for movement and provide a soft, romantic look. On the other hand, tight braids are all about structure and neatness, creating a polished appearance that can last longer and withstand more wear.
For a loose look that is quicker and fuller, pick up larger sections of hair. For a stronger hold and tighter looking braids, pick up smaller sections of hair.
Pulling Out Pieces for Texture
Don’t skip stretching out your braid. Heavily loosen the braid by tugging at the sides until it loses much of its plait shape. This creates a softer, wider appearance and makes the style look effortlessly undone.
Best Hair Products to Use
Use hairspray to help the style hold in place longer. For fine hair, include some dry shampoo before braiding. A teasing comb adds volume at the crown. Once you’re done, tie a ribbon around your hair elastic for old-school femininity.
Claw Clip Updo
The Easiest Beach Hairstyle
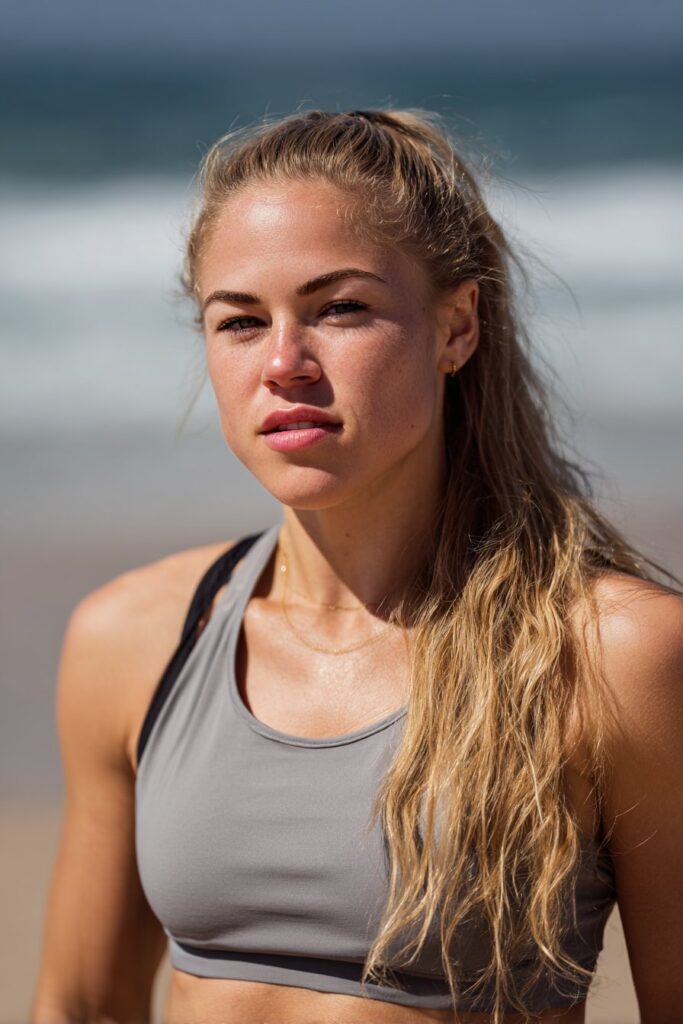
Claw clips are the perfect tool for a quick and easy hairstyle. I keep one in every beach bag because they transform messy hair into a polished updo in under 30 seconds. What makes them superior to other accessories is their health benefits. Researchers at Princeton have found that traditional hair ties cause dents and friction to the hair, which can cause breakage. Claw clips, by contrast, hold your hair in place without denting.
Choosing the Right Clip Size
When choosing a claw clip for long hair, go with one that is at least four inches long and where the walls leave space for your hair to collect. The teeth of the claw clip provide the grip, not the walls, and the more space your hair has to sit reduces the tension against the structure. Thick plastic does not mean longer life; the durability of the material does.
Creating Volume and Height
Start by lightly spritzing your hair with water and applying a small amount of curling custard. For extra grip, section your hair with small bands before securing with the clip. You can also tuck the clip underneath for volume.
Quick Styling for Long Hair
Brush your hair to remove tangles. Pull it back like you’re creating a medium-to-low ponytail position. Twist your hair with your fingers, then pull the length up so it starts to form a vertical bun. Finally, secure the clip and adjust to achieve your desired style.
Conclusion
These 12 beach hairstyles for long hair prove you don’t need to sacrifice style for practicality. From the sleek high ponytail to the romantic side braid, each look protects your strands while keeping you effortlessly chic. Undoubtedly, finding your signature beach style takes some experimentation, but that’s part of the fun. Try the messy bun for casual days, then switch to a braided crown for sunset dinners. By the same token, remember that second-day hair often works better than freshly washed strands for these styles. Your hair deserves to look beautiful while staying protected from sun, salt, and humidity. Pick your favorite style and head to the beach with confidence!

Elsa Claire is the founder and editor of ElsaClaire.com, where she writes about hairstyles, hair care, and the everyday routines that help real people feel good about their hair.