Black hair updo hairstyles have this incredible way of making you feel instantly put together, whether you’re heading to a formal event or just want to elevate your everyday look. I’ve spent years perfecting updos for my clients, and one thing remains clear: black women continuously raise the bar for sophisticated and creative styles. From classic buns to braided updo hairstyles for black hair, the options are endless. In this guide, I’m sharing 15 elegant updo hairstyles for black hair that I personally love, complete with styling tips to help you recreate them confidently.
Classic High Bun Updo

What Makes It Special
The classic high bun remains one of my favorite go-to styles because it does something remarkable: it visually elongates your neck and creates the impression of a more upright posture. I’ve watched clients walk out of my chair standing taller, feeling more confident. This style works beautifully on both long and medium-length hair, adapting to different textures effortlessly. For natural hair, the high bun serves as a protective style that tucks away your ends while still looking polished. The beauty lies in its adaptability—pull it sleek for a minimalist look or leave a few strands loose for something softer and more romantic.
Best Occasions for This Style
I recommend this updo for formal events where you want to look sophisticated without appearing overly done. It pairs exceptionally well with high-necked dresses and blouses, but equally stunning with tops cut low in the back. Brides frequently request this style because it focuses attention on the face and highlights accessories. Beyond weddings, I’ve styled this look for corporate events, dinner parties, and even casual outings when my clients want to feel put together quickly.
My Styling Tips
Start with day-two hair rather than freshly washed strands. The added texture gives you better grip and volume. Before gathering your hair, prep with a mousse to provide both shine and hold. For natural hair, avoid pulling your bun too tight. I’ve seen too many clients deal with unnecessary tension that can lead to hair loss along the hairline. Loosen your bun slightly after securing it—you should never feel pain or excessive pulling at your roots. Invest in quality Japanese bobby pins with grooves; they grip hair without slipping and make all the difference in keeping your style secure throughout the day.
How to Achieve the Look
Brush your hair back and create a high ponytail where you want the bun to sit. Secure it with two elastics for extra hold. Divide your ponytail into sections, then twist each section before wrapping it clockwise around the base. Pin each twist inwards toward the center, making sure each bobby pin catches both the twist and hair from your scalp. Apply hairspray around the edges to tame flyaways. For a sleeker finish, use a finishing brush to smooth any bumps before creating your ponytail.
Sleek Low Chignon

What Makes It Special
The chignon holds a special place in my styling repertoire, partly because of its rich history and partly because of how universally flattering it is. The term comes from the French “chignon de cou,” which translates to nape of the neck. This low placement creates a polished, structured appearance that sets it apart from other bun styles. What I love most about the sleek low chignon is its swirled, three-dimensional shape that comes from wrapping and tucking sections of hair within the bun itself. This technique gives it that signature elegant look that photographs beautifully. I’ve styled chignons on every hair texture imaginable, and it adapts remarkably well whether you have straight, wavy, or natural hair. The style also conceals areas of thinning hair by gathering everything at the back, creating an illusion of fullness.
Best Occasions for This Style
This updo screams sophistication, making it perfect for formal events where you want to look refined without trying too hard. I’ve created countless chignons for weddings, both for brides and guests. One bride paired hers with a 150-year-old heirloom headpiece, and the low placement provided the perfect anchor for the accessory. The chignon also shines at red carpet events and royal engagements. Equally stunning for business meetings or dinner parties where you need to appear polished and professional.
My Styling Tips
Start with second-day hair or spritz dry shampoo on freshly washed strands to add grip. I always reach for a styling gel and apply it from scalp to ends before blow-drying directionally. When gathering your hair into a ponytail, hold your fist firmly against your head with one hand while wrapping a bungee cord around the base without moving your fist. This creates tension without damaging your edges. For face-framing softness, pull out a few loose tendrils and curl them away from your face. Use bobby pins with grooves underneath to secure each section, and finish with a light veil of hairspray.
How to Achieve the Look
Part your hair down the middle and smooth it behind your ears, gathering everything at the nape. Secure into a low ponytail, then twist it counter-clockwise around the base, forming a doughnut shape. Coil tightly for sleekness or keep it looser for a relaxed effect. Use your index finger to hold the bun in place while rolling it around the elastic, then secure each side with bobby pins. For thicker hair, create two ponytails and twist the top one over the bottom, then wrap the bottom ponytail around and pin. Gently tug the edges to achieve your desired shape.
Braided Crown Updo

What Makes It Special
Crown braids carry this romantic, almost fairytale quality that instantly catches the eye. I’ve had clients describe the feeling of wearing one as “queenly,” and honestly, that’s exactly what it delivers. The braid wraps around your head like an actual crown, creating statement texture visible from every angle. What sets this style apart is its remarkable versatility across all hair textures and lengths. The confidence that comes from wearing a crown is unparalleled, and this hairstyle lets you channel that energy without needing an actual tiara. I’ve created crown braids using Dutch braids for dimension, fishtails for intricate detail, and even pull-through braids for clients who want the look without traditional braiding skills.
Best Occasions for This Style
Brides request this style constantly, and I understand why. Crown braids photograph beautifully and keep hair secure throughout long ceremonies and receptions. Beyond weddings, this updo shines at festivals, summer events where you need to beat the heat, and red carpet occasions. The style dates back to Medieval times and has graced countless formal events since. Equally stunning for casual weekend outings or date nights when you want something special without appearing overdone.
My Styling Tips
Start by brushing thoroughly to eliminate tangles. For clients new to this technique, I recommend creating a ponytail first near your fringe area, then braiding from there. This shortcut saves precious minutes and makes the process more manageable. Quality bobby pins matter tremendously here. Prior to styling, spray with a fine mist hairspray to control flyaways. At night, cover your crown braid with a satin bonnet to prevent unraveling. Each morning, lightly spritz with a hydrating mist and gently reshape any loosened sections.
How to Achieve the Look
Part hair to your dominant side for easier braiding. Grab a one-inch section at your hairline and divide into three pieces. Begin Dutch braiding down the side of your head, incorporating new hair as you progress. Curve the braid around your head near the nape. Once you’ve added all available hair, finish with a regular three-strand braid and secure with an elastic. Tuck the ends underneath and pin securely.
Twisted Side Updo with Hair Jewelry

What Makes It Special
Side placement changes everything about how an updo functions. Pulling your hair to one side keeps strands completely out of the way while providing comfort and breathability, which makes this style particularly valuable for warm climates or outdoor events. I’ve styled countless updos for summer weddings, and brides consistently thank me for this practical choice. Beyond function, side updos look polished and pretty. The twisted technique adds texture that creates a deliberately tousled appearance, giving you that effortlessly chic vibe. What truly sets this style apart is how beautifully it showcases hair jewelry. Sparkly accessories infuse glamor into the look, and the side placement provides the perfect canvas for statement pieces to shine. I’ve watched accessories completely transform this updo from casual to red-carpet worthy.
Best Occasions for This Style
Weddings top my list for this style. The oversized side placement, particularly when infused with pearls, offers an elegant and sophisticated flair. One client wore this to a fall event and received compliments all evening on how her pearl accessories elevated the entire look. Formal affairs where you want drama work beautifully. Adding height to the top of your head while keeping the bulk on one side creates visual interest. Furthermore, this updo suits holiday parties perfectly, especially when paired with festive headpieces or sparkly headbands.
My Styling Tips
Divide your hair into three even sections as low and close together as possible. The messier your twisted buns appear, the better the final result. I always tell clients that perfection isn’t the goal here. Overlap your buns so the hairstyle looks cohesive rather than separate sections. U-shaped pins work remarkably well for twisted styles, holding hair securely with minimal effort. Given these points, select accessories that complement rather than compete with your jewelry. For sparkly hair accessories, keep earrings simple.
How to Achieve the Look
Tie off each of your three sections with clear elastics. Twist the middle section into a bun and secure with bobby pins. Take one side section, twist it into a bun, and overlap it with the first bun. Repeat this process with the remaining side, ensuring all three buns connect seamlessly. Use a weaving motion with bobby pins to hide them under hair sections. Curl any front pieces framing your face for a finished touch.
Natural Afro Puff Updo

What Makes It Special
I’ve watched natural hair movements rise and fall throughout my career, but the afro puff remains a constant celebration of texture and volume. This style evolved during the mid-1960s Black Is Beautiful movement, and its cultural significance still resonates when my clients wear it proudly. The afro puff consists of rounded, puffy sections of hair, basically smaller versions of a full afro. What makes me recommend this style repeatedly is how it showcases your natural texture without manipulation or heat. The style works as a protective updo that keeps ends tucked away while simultaneously displaying your hair’s volume. My clients describe feeling liberated wearing this look. It’s also known as the pineapple updo, aptly named for how the curls resemble that tropical fruit. The timeless classic offers feminine sophistication with remarkably low maintenance.
Best Occasions for This Style
This versatile updo adapts to almost any occasion. I’ve styled afro puffs for clients heading to corporate meetings, weekend brunches, and formal galas. One client wore hers to a job interview and later told me it helped her feel confident and authentic. The style transitions seamlessly from gym sessions to dinner dates. For more casual settings, leave it natural and fluffy. For formal events, smooth your edges and add elegant accessories like headbands or scarves.
My Styling Tips
Start with stretched hair rather than freshly washed strands. I recommend doing a braid-out or twist-out the night before for better definition and easier styling. Work in sections while moisturizing, then add your preferred oil. Be gentle when pulling hair back to avoid damaging your edges. This point matters tremendously because I’ve seen too many clients sacrifice their hairline for a tight puff. Wear a satin-lined bonnet at night to maintain moisture and prevent frizz.
How to Achieve the Look
Gently brush your edges, then cut an elasticated headband in half and place it around your head, tying at the front. Slowly tighten by pulling the ends without making it uncomfortably tight. Secure by tying again and tucking in the ends. Fluff out your puff with your fingers for volume. For added dimension, create two front twists before securing your headband, letting them frame your face.
Elegant Cornrow Updo with Curls

What Makes It Special
Cornrows paired with curls create this stunning contrast that never fails to turn heads in my chair. The tight, structured braids close to your scalp transition into soft, bouncy curls or twists, giving you the best of both worlds. I remember one client who requested large feed-in cornrows with gold string woven through a few braids. That small detail elevated the entire look from beautiful to absolutely showstopping. The intricate designs I create often include criss-cross braids and twists along the hairline, and finishing each braid end with a cuff bead adds that wow factor my clients constantly request. This style functions as a protective updo for natural hair, and according to my experience, cornrows last anywhere from two to six weeks with proper care. The combination of tiny cornrows with gold cuff beads and a natural puff bun at the back makes a bold statement while keeping your hair protected.
Best Occasions for This Style
Cornrow updos work beautifully for formal occasions where you want sophistication with an edge. I’ve styled this look for special events and weddings countless times. One bride paired hers with a soft, romantic finish by leaving curls out at the ends, and the photos captured pure elegance. The style adapts equally well to daily wear, whether you’re headed to work or weekend errands. Updo cornrows make an artfully woven statement at any event, particularly when decorated with accessories.
My Styling Tips
Speak up if your braider applies too much tension during installation. I’ve seen clients deal with unnecessary discomfort that could have been avoided. Moisturizing your scalp regularly and wearing a head covering at night extends the life of your cornrows significantly. In order to keep them clean without unraveling, spray a mixture of sulfate-free shampoo, water, and oil onto damp hair, then lightly massage your scalp while squeezing the braids rather than rubbing. The cost ranges from USD 80 to USD 300 depending on length, thickness, complexity, your location, and your stylist.
How to Achieve the Look
Create a curved part on the side of your head after blow-drying, then begin cornrowing from that section. Cornrow the back going upward and curved toward the center. For the front portions, use flexi rods to create heatless curls, then separate each curl into four sections for added fullness. You can also cornrow in curved designs at the back, add single strand twists near the crown and front, then pin curl those twists for an elegant finish.
Goddess Locs High Bun

What Makes It Special
Goddess locs offer this remarkable advantage when styled into a high bun: you can pull off the look in under five minutes without reaching for a single bobby pin. I’ve styled countless clients with goddess locs, and the high bun consistently delivers that chic, elegant appearance perfect for formal events. What strikes me most is how adaptable this updo proves across different locs lengths. Even when your locs barely touch your shoulders, you can still create a stunning high bun. Simple accessories transform this everyday style into something formal-worthy. The high placement creates that regal effect my clients describe as feeling instantly polished, whether they’re headed to work or a red carpet event.
Best Occasions for This Style
This style serves you well for literally any occasion. I’ve watched clients wear their goddess locs high bun to business meetings, weddings, casual weekend outings, and formal galas. The updo elevates goddess locs beautifully for formal events and red carpet appearances.
My Styling Tips
Keep your bun loose rather than pulling it tight. I remind every client about this because excessive tension irritates your scalp and causes hair breakage. Furthermore, avoid styling your goddess locs into buns too frequently for this same reason.
How to Achieve the Look
Gather your locs at your crown and wrap them around themselves, creating a doughnut shape. Secure with a hair tie, fluff gently, and you’re done.
Flat Twist Low Bun

What Makes It Special
Flat twists combine two strands twisted close to your scalp, creating thick, tightly woven sections that deliver a polished appearance. I love recommending this style because it functions as a protective option, keeping your strands tucked and secure to reduce breakage. The low bun placement brings a restrained, romantic quality that works beautifully across different settings. What sets flat twists apart is their versatility—you can keep them in for one to three weeks with proper maintenance. During my years styling natural hair, I’ve noticed how flat rolls create a faster, rope-like texture perfect for updos.
Best Occasions for This Style
This updo shines in office environments and casual outings alike. I’ve styled countless clients who wear this look throughout their work week because it stays put without constant adjusting. The polished nature makes it equally suitable for dates, weekend errands, or any situation requiring an effortlessly put-together appearance.
My Styling Tips
Moisturize regularly with hair oil to maintain your twists. Subsequently, wear a satin bonnet at night and avoid over-manipulating your style. Gather your completed twists at the back of your head before securing them into your bun.
How to Achieve the Look
Section hair from front to back, then flat twist each row working backward. Once you reach the nape, secure all twists together and twist them around themselves to form your low bun. Pin securely inward toward the center.
Braided Mohawk Updo

What Makes It Special
Braided mohawks strike that perfect balance of bold and beautiful: clean cornrows on the sides, height through the center, and endless ways to play with length, curls, and color. I’ve styled this look countless times for clients who want a protective style that still feels edgy and feminine. What I find remarkable is how the updo version wraps, twists, and braids your hair into a sculptural masterpiece sitting tall down the center. The side rows frame your face while the bun adds height without the weight of long tails. Furthermore, stacked buns create First-Lady levels of elegance. This style adapts beautifully across different braid types—fishtail, Dutch, or classic three-strand variations work perfectly.
Best Occasions for This Style
This updo shines at weddings, proms, or any event where you need to be the most striking person in the room. I’ve created mohawk updos for brides seeking refined drama and corporate professionals who aren’t afraid to stand out. The style remains office-appropriate while never feeling basic. On balance, it works equally well for casual events where you want to make a statement.
My Styling Tips
Turn the volume up with details. I always recommend gold cuffs, cowry or wooden beads, ombré extensions, and stitch-perfect side patterns—chevrons, S-curves, or skinny stitches that make the mohawk pop. Accessories highlight the parting and add personality without changing the base style.
How to Achieve the Look
Create cornrows along both sides, leaving hair through the center loose. Gather the center section and twist into multiple buns stacked vertically, pinning each securely. Alternatively, braid the center section upward and coil it into a single high bun for a streamlined finish.
Space Buns Updo

What Makes It Special
Space buns get their name from Princess Leia’s iconic hairstyle in Star Wars. This double-bun look divides your hair into two sections positioned on either side of your part. I started creating space buns early in my New York years when festival season hit, and honestly, they’ve become one of my favorite versatile updos for black hair. The style adapts remarkably well across all hair types and textures. Textured, curly, or coily hair pairs perfectly with styled edges, and I’ve watched clients light up when they see how the swoops and swirls of their baby hairs transform the entire look. Space buns work equally well sleek and polished or messy and textured.
Best Occasions for This Style
Music festivals remain the classic setting for space buns, but I’ve styled them for red carpet events, casual weekend outings, and everything in between. The look transitions seamlessly from day to night. Correspondingly, I’ve created space buns for clients heading to work, pool parties, and formal occasions.
My Styling Tips
Position your buns at the crown for that classic placement, or adjust lower based on your preference. For short hair, embrace the fanned-out ends rather than fighting them. Add accessories like butterfly clips, pearls, beads, or glitter to elevate your look.
How to Achieve the Look
Part hair down the center and create two high ponytails. Twist each ponytail around its base and secure with bobby pins. Pull out face-framing pieces and mist with hairspray for hold.
Halo Braid Updo

What Makes It Special
Halo braids create this ethereal, almost angelic effect that instantly elevates your entire presence. The delicate plaits wrapped around your head form a crown that makes you feel like royalty without needing an actual tiara. What I appreciate most during my years styling these braids is how they function as a protective style while looking absolutely stunning. The technique involves Dutch braiding around your head’s perimeter, picking up hair only from underneath to create that signature halo appearance. This style adapts beautifully whether you want it loose and romantic or tighter and more structured. Beyond esthetics, halo braids minimize manipulation and reduce breakage for black hair health.
Best Occasions for This Style
I’ve styled halo braids for countless weddings, and they photograph beautifully from every angle. Red carpet events showcase this look season after season. Given that they’re quick to DIY, halo braids work perfectly year-round for everything from music festivals to formal galas.
My Styling Tips
Texture matters tremendously. I use a teasing brush before braiding to visually double your hair volume. Leave face-framing pieces out while braiding for sophisticated elegance rather than a severe look. Gently massage each braid section from scalp to ends instead of traditional pancaking for that ethereal veil effect. Cover with satin at night to maintain the style.
How to Achieve the Look
Begin Dutch braiding at your nape, crossing strands under while picking up hair only from underneath as you work around your head[542]. Secure ends with bobby pins, then lightly pull braid edges to create fullness. Finish with medium-hold hairspray.
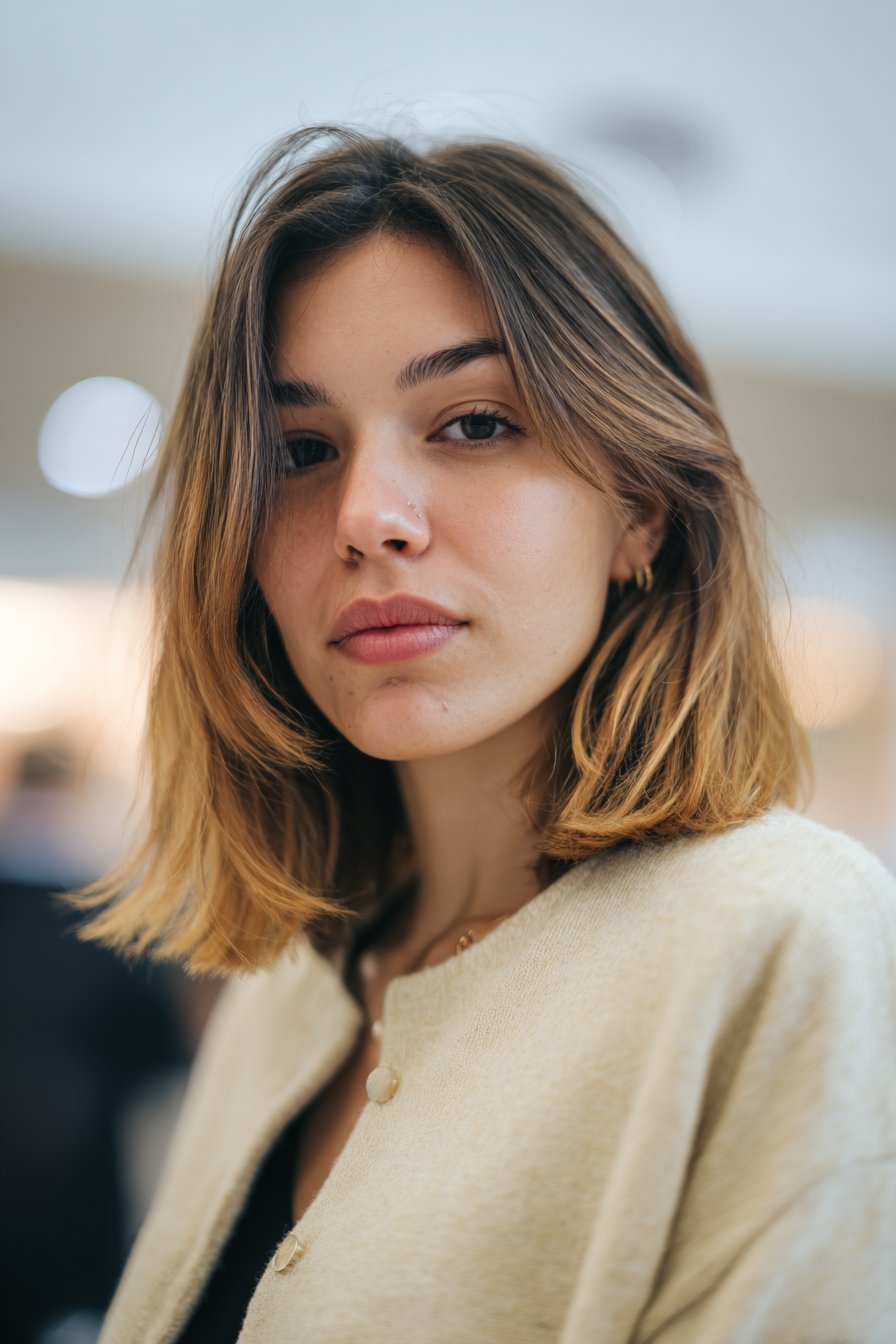
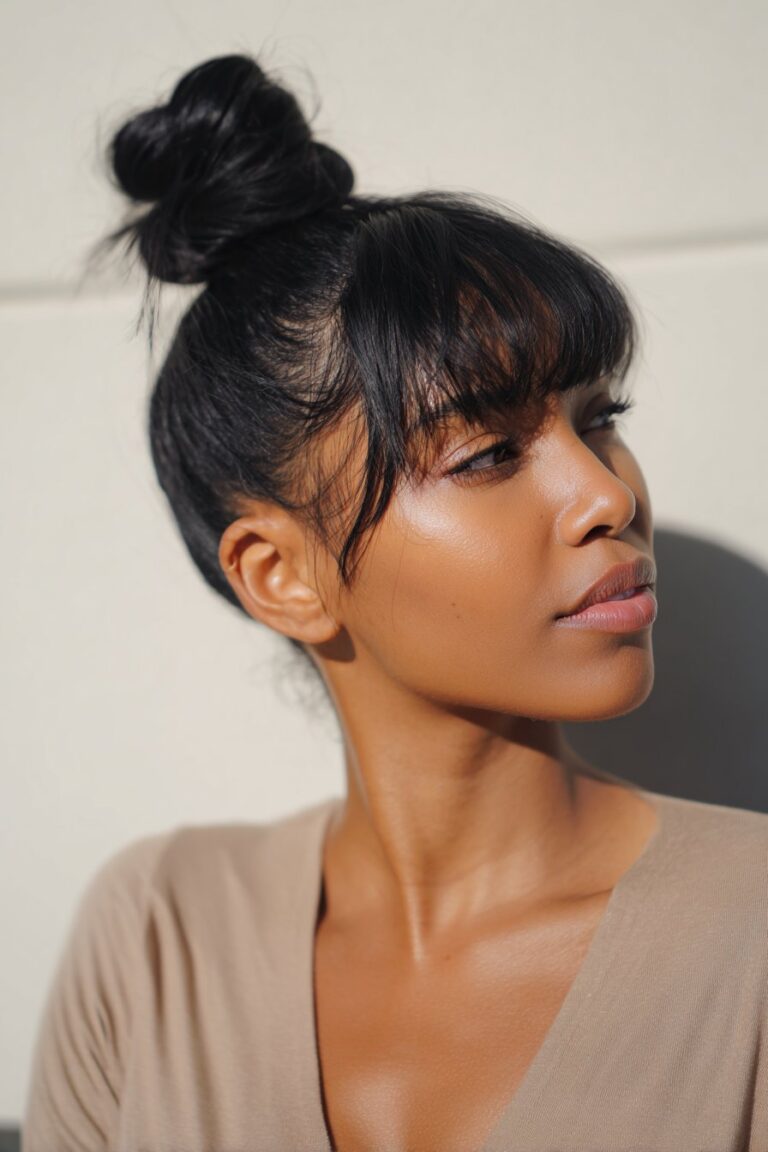
Elegant Top Knot with Bang

What Makes It Special
Top knots earned their reputation as the go-to two-second hairstyle, and adding bangs transforms this simple updo into something truly special. Wispy front bangs have dominated styling trends, and pairing them with a top knot creates an effortlessly chic combination. This style proves particularly flattering for wide foreheads and narrow chins. The versatility amazes me—you can pull your hair sleek like a ballerina bun or embrace the messier version that feels more relaxed. For instance, swoop bangs add sophistication, while side bangs bring drama and asymmetry. I’ve styled this look on 4c hair countless times, and it adapts beautifully across all textures.
Best Occasions for This Style
This updo transitions seamlessly from brunch to formal events. I’ve created top knots with bangs for busy clients heading to work, casual weekend outings, and dressed-up evening affairs. The style works equally well for after-work drinks or red carpet moments.
My Styling Tips
Choose bang styles that complement your face shape—middle part bangs create a soft, relaxed appearance. On balance, apply freeze hairspray and edge booster for that smooth, sleek finish. Allow face-framing layers to fall naturally rather than forcing them into place.
How to Achieve the Look
Twist your hair into a high ponytail and secure with an elastic. Subsequently, braid the ponytail, wrap it around the base, and pin inwards. Style your bangs by keeping them straight or adding soft waves with a curling iron.
Jumbo Twist Updo

What Makes It Special
Jumbo twists create this beautiful balance between protective styling and stunning visual appeal. The flat twist technique uses two sets of jumbo flat twists styled into a clean, symmetrical updo at the back. What I find remarkable is how the sectioned twists create dimensional effects that work effortlessly for both casual and formal occasions. Specifically, this style proves perfect for clients without long or thick natural hair. By using afro kinky bulk human hair, you can add length and volume that looks and feels natural.
Best Occasions for This Style
This versatile updo adapts to practically any setting. I’ve styled jumbo twist updos for clients heading to the gym, work meetings, and evening events. The style transitions seamlessly throughout your day.
My Styling Tips
Hair selection matters. Most twists use marley hair with its slightly coarse, kinky texture, though Kanekalon braiding hair offers a shinier finish. Human hair works identically well. Add beads or hair cuffs to enhance visual appeal. This style is beginner-friendly, making it accessible even if you’re new to protective styling.
How to Achieve the Look
Create two sets of jumbo flat twists along your scalp. Arrange them symmetrically and pinch together at the back, forming a structured, elevated updo.
Rolled Updo with Accessories

What Makes It Special
Vintage esthetics meet modern elegance when you roll sections of hair back toward the crown and secure them with accessories. I discovered the beauty of rolled updos during my early New York years, styling vintage-inspired looks for editorial shoots. The elegant roll adds sophistication to any look, and quality hair accessories enhance this classic style beautifully. What truly sets this updo apart is how accessories transform it from simple to showstopping. Statement pieces and elaborate hairpins work exceptionally well because their teeth grip securely into the rolled sections. Quality accessories provide durability to withstand tension, come in stylish designs, offer comfort without causing headaches, and prove versatile across multiple hairstyles.
Best Occasions for This Style
Rolled updos shine at weddings, proms, and formal occasions. I’ve styled countless brides who paired this look with heirloom accessories, creating unforgettable moments. The versatility adapts equally well to homecoming dances and any event requiring polished elegance.
My Styling Tips
Match your accessories to your ensemble for a cohesive appearance. U-shaped pins hold rolled styles remarkably well with minimal effort. Choose decorative pins, headbands, or even a tiara to instantly elevate the look. Black accessories read formal, while colored or patterned pieces communicate casual sophistication.
How to Achieve the Look
Pull hair into a low ponytail and split it just above your elastic. Loop the ponytail through that space, creating an inside-out effect. Roll the remaining hair around your finger and secure with bobby pins. Set with medium-hold hairspray and add your chosen accessories.
Textured Faux Hawk Updo

What Makes It Special
The faux hawk strikes a balance between edgy and wearable that I absolutely love. Unlike traditional mohawks requiring shaved sides, this version uses tapered or faded sides, creating a gradual transition that maintains professionalism. I’ve styled faux hawks on natural 4b-4c curls and short hair countless times, and it adapts beautifully across textures. The textured approach adds windswept movement and romantic softness through face-framing tendrils. What makes me recommend this repeatedly is its versatility—you can pull it messy for casual edge or slicked-back for polished sophistication.
Best Occasions for This Style
This updo works for nearly any setting. During my years in New York, I created faux hawks for clients heading to formal events, professional meetings, and casual nights out. The style transitions seamlessly between settings because you control the drama level through styling choices.
My Styling Tips
Apply dry shampoo to add grip and texture. For thin hair, volumizing mousse at the roots creates necessary lift. Use small sections when pinning—bobby pins with grooves hold textured styles more securely. Finish with strong-hold hairspray to maintain structure throughout your day.
How to Achieve the Look
Pull temple hair toward your crown and secure with elastics, leaving the center section free. Repeat in rows until you reach your nape, creating a gap down the center. Fluff the middle section upward and pin into place, securing sides tightly while keeping the center voluminous.
Key Takeaways
Master these expert-curated updo styles to elevate your look for any occasion, from casual outings to formal events.
• Choose updos based on occasion: Classic high buns and chignons work for formal events, while afro puffs and space buns suit casual settings perfectly.
• Prioritize hair health over perfection: Avoid excessive tension when styling to prevent edge damage and breakage—loose, comfortable styles last longer.
• Start with textured, day-old hair: Second-day hair provides better grip and volume than freshly washed strands for most updo styles.
• Invest in quality tools and accessories: Japanese bobby pins with grooves, U-shaped pins, and satin bonnets make styling easier and help maintain your look.
• Embrace your natural texture: Protective styles like cornrow updos, flat twists, and goddess locs celebrate your hair’s natural beauty while keeping it healthy.
Remember that not every style will become your signature look—experiment with different techniques until you find what makes you feel confident and authentically beautiful.
Conclusion
These 15 elegant updos represent years of my styling experience and countless hours perfecting techniques that work for black hair. Each style offers something unique, whether you need sophistication for a formal event or effortless polish for daily wear. What I love most is how these updos adapt to your personal style and hair texture. Not every updo will become your signature look, and that’s perfectly fine. Experiment with different techniques until you discover what makes you feel confident and beautiful. Your hair tells a story, and my goal has always been helping you tell yours with authenticity. Start with one style that speaks to you, master it, then explore others as long as you’re enjoying the process.