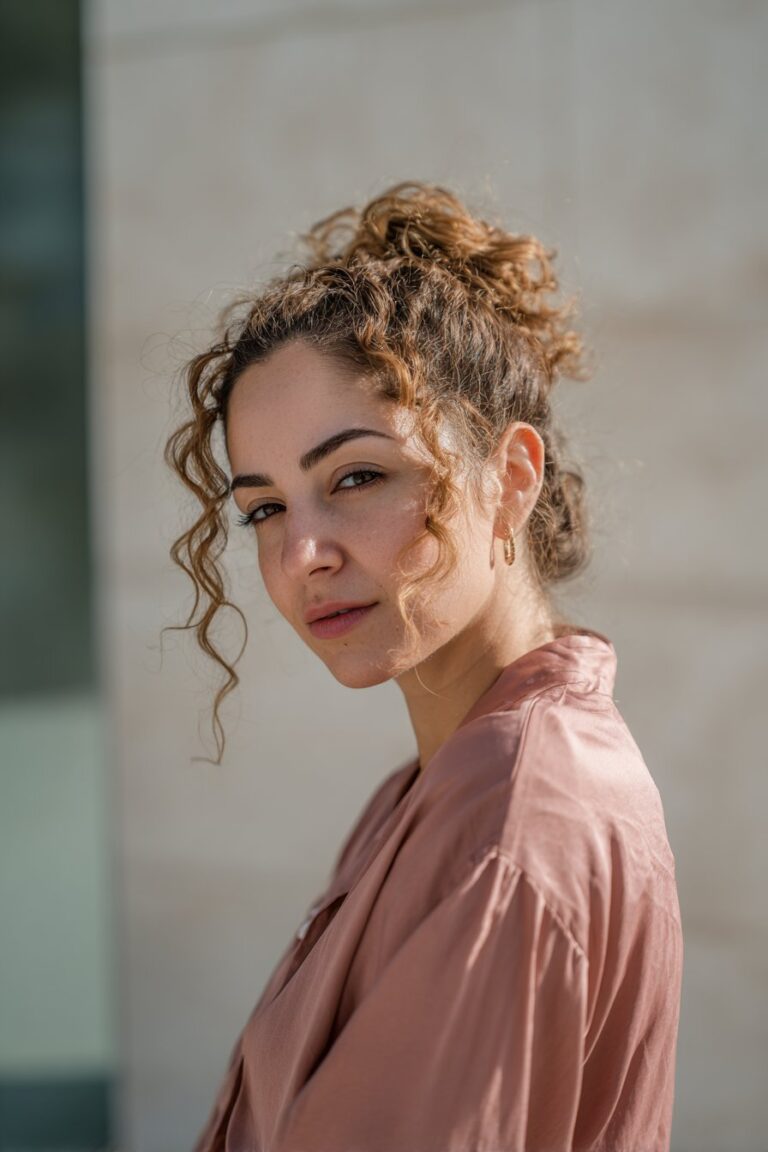
Struggling with your curly locks every morning? I get it! As someone with curly shoulder length hair, I know the daily battle of wanting to look polished without spending hours in front of the mirror.
These days, I’ve actually mastered several quick curly shoulder length hair updos that take 10 minutes or less. When time is running short (which, let’s be honest, is most mornings), having reliable medium length curly hair updos in your styling arsenal is a game-changer. Whether you’re heading to work, meeting friends, or attending a special event, easy updos for medium curly hair can save your day – and your sanity!
I’ve gathered 12 stunning updo hairstyles for shoulder length curly hair that you can count on even in a time crunch. The best part? Many of these shoulder length curly hair updos work perfectly for both casual and fancy occasions. Plus, these styles require no heat tools, making them healthier options for your beautiful curls.
In this collection, I’ve focused on tutorials you can follow along with easily, though I’ve included a few inspirational ideas too. From the classic low messy bun to the elegant French pin chignon, each style is designed specifically for your curly texture and shoulder-length cut. Let’s dive into these time-saving styles that will have you looking put-together in minutes!
Low Messy Bun

The low messy bun has become my go-to style for those hectic mornings. This versatile updo works beautifully with curly shoulder length hair and gives that effortlessly chic look in minutes.
Low Messy Bun styling tips
For curly hair, the messy bun should embrace your natural texture rather than fight it. I’ve found that avoiding brushes is key – instead, use your fingers to gently detangle any knots. This preserves your curl pattern while giving you control.
For the best grip and hold, I recommend silk-lined scrunchies or thinner hair ties that won’t stretch out your curls. Additionally, third-day hair works wonders for this style since natural oils and product buildup add excellent texture and grip.
To create the perfect low messy bun:
- Part your hair according to your preference
- Gather your hair at the nape of your neck
- Twist the ponytail around the elastic to form your bun
- Secure with bobby pins or another elastic
- Gently tug sections to loosen for that perfectly undone look
Low Messy Bun for shoulder length curly hair
The beauty of this style for medium curly hair is that it works with your texture rather than against it. I’ve discovered that keeping the wraps loose around your hair tie helps maintain your natural wave pattern and prevents damage. Furthermore, don’t worry about achieving perfection – those flyaways actually add character to a messy updo.
For curly shoulder length hair specifically, a super-stretchy microfiber elastic makes all the difference. Unlike straight hair, our curls have more volume and texture, so we need less “stuff” to make the bun look full and dimensional.
Low Messy Bun time-saving tricks
In a morning rush, this is my ultimate time-saver. I’ve perfected a no-hair-tie method that’s perfect for emergencies: gather hair at the nape, fold it in half, twirl upward with ends free, then tuck and secure the ends.
Alternatively, use a scrunchie wrapped halfway through your ponytail, then twist remaining hair around it for an instant messy bun.
For second-day curls, this style is ideal – no need to rewash or style from scratch. I simply spritz with a light texture spray for added volume. Moreover, this style transitions perfectly from day to evening by simply adding a satin ribbon for a more sophisticated look.
The low messy bun remains chic for any occasion while keeping strands off your face – a true win-win for those of us with curly shoulder length hair seeking style without the stress.
High Curly Ponytail

For days when I want both volume and polish, the high curly ponytail delivers dramatic impact in minutes. This elevated style celebrates the natural texture of curly hair while keeping it stylishly contained.
High Curly Ponytail styling tips
Creating the perfect high ponytail for curly hair requires a few special techniques. First, I always start by applying a small amount of hair gel to smooth flyaways at the roots. The L’Oréal Paris LOCK IT Clean Style Gel works wonders for this purpose.
My step-by-step approach:
- Brush curls gently toward the crown of your head
- Secure with a strong hair elastic that won’t snap
- Wrap a strand of hair around the elastic for a polished finish
- Add a dime-sized amount of gel to roots for sleekness
For extra volume (which curly hair naturally provides!), I gently tease the ponytail or pull sections slightly to create that coveted fluffiness. The contrast between sleek sides and a voluminous pony creates a stunning disco diva effect that works for both casual and formal settings.
High Curly Ponytail for medium curly hair
Shoulder-length curly hair presents the perfect canvas for this style. The natural bounce of medium-length curls creates instant volume without requiring extensions or excessive teasing.
For those with super thick curly hair, the natural high piled ponytail lets your texture shine with minimal product. I find that parting my hair from ear to ear and securing just the top half creates a beautiful half-up ponytail that showcases length while keeping strands off my face.
Alternatively, for a more dramatic look, flat twists combined with a high pony offer an elegant twist. This style begins with creating a two-inch section down the middle, twisting strands over and under each other, then pulling remaining hair into a ponytail.
High Curly Ponytail accessories
The right accessories elevate this already striking style. For curly-haired beauties struggling with thick hair, specialized hair clamps designed specifically for various curl types make securing ponytails much easier.
My favorite accessories include:
- Round banana clips in different sizes for creating perfect ponytails
- Stretchy head wraps in various patterns to add color and personality
- Beads and hair cuffs for decorating twist sections
- Statement hair ties that complement rather than compete with your curls
I discovered that silk scrunchies prevent breakage and don’t catch on curls like regular elastics might. Furthermore, these accessories not only enhance the look but also help distribute tension evenly across the hair, preventing damage to delicate curls.
The high curly ponytail remains one of my fastest, most versatile styles—equally appropriate for office meetings or evening events. With the right techniques and accessories, it transforms from a basic updo into a statement style that celebrates rather than subdues your natural texture.
French Pin Chignon

The elegant French pin chignon has become my secret weapon for creating polished updos in minutes. This classic style offers a sophisticated alternative that’s surprisingly accessible for curly shoulder length hair.
French Pin Chignon elegance
French pins (also called chignon pins) create an effortlessly chic look that’s both timeless and modern. Unlike traditional hair accessories, these two-pronged pins lay completely flat against the head, making them exceptionally comfortable for all-day wear. I’ve worn mine during long workdays and never experienced that dreaded “hairpin headache” that comes with bobby pins.
What truly sets this style apart is its understated elegance. The smooth design glides into hair effortlessly, creating a sleek silhouette without damaging your curls. In essence, it’s the perfect balance between sophistication and simplicity – ideal for everything from office meetings to special occasions.
French Pin Chignon for curly hair
My curly-haired clients often believe that French pins won’t work with their texture – a misconception I’m happy to correct! In fact, curly hair provides excellent grip and volume for this style.
The beauty of using French pins with curly hair is that they secure without tension. Beyond that, they preserve your natural curl pattern instead of fighting against it. For medium-length curly hair, I recommend choosing pins based on your hair’s thickness:
- Fine curly hair: 10cm chignon pin or small pins (6x small set)
- Thick curly hair: Long French pins or multiple smaller pins spaced evenly
One major advantage I’ve discovered is how these pins distribute weight evenly across your head, preventing strain on any single area. This makes the style particularly comfortable for those with heavy, thick curls who typically struggle with updos.
French Pin Chignon quick steps
Creating this elegant updo takes practice, yet becomes second nature once mastered:
- Gather all hair at the nape of your neck, placing your thumb underneath.
- With your opposite hand, twist hair upward against your head.
- Tuck ends under slightly, creating a small pocket beside the twist.
- Hold the style firmly with one hand.
- With the pin facing curve-out, push prongs through the top-middle layers.
- Flip the pin and slide it downward, following your head’s curve.
For curly shoulder-length hair specifically, I find starting with slightly damp hair provides better control. Additionally, placing the pin slightly higher (not too low) prevents the style from becoming top-heavy.
Primarily, remember that French pin chignons get easier with practice. The first few attempts might feel awkward, but once mastered, you’ll have an elegant updo that takes mere minutes to create while celebrating your natural curl pattern.
Rope Twist Updo

I’ve always been amazed at how rope twists create an elegant yet deceptively simple updo that perfectly complements my curly shoulder length hair. These stunning twists—occasionally called Senegalese twists—offer a versatile way to elevate your look alongside protecting your natural curl pattern. Beyond appearance, I love how they look more complex than they actually are!
Rope Twist Updo instructions
Creating a rope twist updo takes just minutes once you master the basic technique:
- Section your hair into three parts (left, middle, right)
- Secure the middle section with an elastic and twist it into a low bun with bobby pins
- Take one side section, divide it into two parts, and twist each separately
- Next, twist these two parts together (this keeps the twist from unraveling)
- Wrap this twisted section around your bun and secure with bobby pins
- Repeat on the opposite side
- Add hairspray if desired
The secret to a successful rope twist lies in the direction of your twisting. I always twist both strands in the same direction first, subsequently crossing the front strand over the back strand—this prevents the twist from coming undone.
Rope Twist Updo for curly medium length hair
My clients with shoulder length curly hair particularly appreciate this style because it works with their natural texture instead of fighting against it. Primarily, this updo celebrates texture and dimension that curly hair naturally provides.
What makes this style ideal for curly medium length hair is its versatility. It works beautifully for both casual errands and fancy occasions. Plus, my curly-haired clients report that it holds securely without causing the breakage or tension that other updos might create.
One adaptation I often suggest: if your curls are especially thick, simply divide each section into smaller parts before twisting. Essentially, you’re creating thinner rope twists that are easier to manipulate and pin.
Rope Twist Updo styling tools
The beauty of this style lies in its simplicity—you need minimal tools:
- Bobby pins (8-10 should suffice)
- Elastic hair ties (small, preferably clear ones)
- Optional: light-hold hairspray to tame flyaways
For those with frizz-prone curls, I recommend having a small amount of styling cream or serum on hand. The right curly hair stylers make prepping your locks much easier. Depending on your hair’s texture and porosity, you might need different products, but generally, less is more.
A texture spray can give additional hold without weighing down your curls. For extra security in very active situations, I suggest having 2-4 additional bobby pins on hand.
This updo has saved me countless times—from impromptu client meetings to formal events when I needed a polished look without spending hours styling my curls.
Half-Up Space Buns

Space buns have saved my styling routine countless times! This playful yet practical updo offers a perfect solution for curly shoulder-length hair when you need both style and functionality. As someone who’s styled countless curly manes, I’ve found half-up space buns to be extraordinarily versatile and surprisingly quick to create.
Half-Up Space Buns for curly hair
Half-up space buns work exceptionally well with curly hair textures. The natural volume and movement of curls add character and dimension that straight hair simply can’t match. I often tell my curly-haired clients that this style actually looks more flattering on them precisely because of their natural texture.
The half-up half-down approach is particularly suited for wavy and curly hair because of the added volume and texture your curls naturally provide. This style allows you to showcase your beautiful curl pattern while keeping hair partially off your face – the best of both worlds!
Half-Up Space Buns styling tips
For shoulder-length curly hair, placement is everything. Position your pigtails higher on your head where your hair is longest to achieve fuller-looking buns. I’ve discovered through years of styling that this simple adjustment makes a tremendous difference in the final look.
My foolproof technique for creating perfect space buns:
- Part your hair evenly down the middle to create two sections
- Pull both sections up into high buns and secure with scrunchies
- Instead of pulling hair all the way through on the last wrap, create a small loop with your ponytail
- Pin the loose ends around the base of each bun to create the illusion of fullness
- Use small clips to secure any shorter pieces that might escape
One crucial tip: this style definitely holds better on “dirty” hair! I recommend trying it on your 3rd or 4th day curls when there’s more natural grip to work with. The extra texture makes your buns stay put without excessive product.
Half-Up Space Buns for casual events
This style has become my signature recommendation for casual outings. The half-up space bun approach keeps you looking put-together yet approachable—perfect for coffee dates, shopping trips, or casual gatherings.
What makes this style particularly suitable for everyday wear is how it combines practicality with personality. Your face remains framed by your beautiful curls while the buns add a playful element that expresses creativity. Plus, unlike full updos, this style doesn’t require constant adjusting throughout the day.
To elevate this look slightly for more special occasions, I often suggest adding decorative pins or colorful scrunchies that complement your outfit. The versatility means you can adapt this single style for various casual settings with minimal effort.
Claw Clip Twist

My clients with curly locks often ask about my favorite quick-styling secret: the humble claw clip. These versatile accessories offer a gentle yet secure option for styling curly shoulder length hair without causing damage or disrupting your natural curl pattern.
Claw Clip Twist for curly hair
Claw clips work exceptionally well with curly hair mainly because they distribute pressure evenly, reducing the risk of frizz while maintaining your curl shape. As someone who styles curly hair daily, I’ve noticed how these clips gently hold curls in place without the breakage that elastic bands often cause.
What makes claw clips perfect for curly textures is their ability to celebrate natural volume. Unlike rough elastics that flatten curls, these clips help maintain bounce and shape. For my clients with thick curly hair, I recommend larger clips with stronger prongs to securely hold their abundant texture.
One technique I love: gathering hair at the crown, gently twisting it back, and securing with a claw clip. This creates a sophisticated look that works wonderfully with the natural texture of medium-length curly hair.
Claw Clip Twist styling tools
For curly hair, choosing the right clip makes all the difference. Beyond size, consider:
- Prong strength: Thicker curls need sturdier prongs
- Clip width: Wider clips distribute tension more evenly
- Material: Smooth-finished clips prevent snagging curls
- Spring tension: Medium tension offers security without pulling
I typically begin styling with hair prep products specifically made for curly hair to protect texture. After application, I let hair air dry or use a diffuser before styling with clips.
Claw Clip Twist for quick updos
Whenever I’m pressed for time, I reach for claw clips to create elegant styles in minutes. These clips offer multiple quick options:
The half-up style remains my favorite for everyday wear—secure the top section of curls while letting the rest flow freely. This 90s-inspired look has become increasingly popular, as it’s not only quick but causes minimal damage to curly hair.
For formal occasions, try a low twisted bun secured with a decorative claw clip. This elevates the look while providing all-day comfort. Alternatively, a side-swept style creates chic asymmetry—simply create a deep side part, twist one side back, and secure with your clip.
Indeed, what I love most about claw clip styles is how they transition effortlessly from casual to elegant by simply changing the clip’s design or placement.
Easy Low Curly Bun

The elegant simplicity of a low curly bun makes it one of my all-time favorite styles for shoulder length curly hair. As a hairstylist, I’ve perfected this versatile updo that strikes the perfect balance between polished and effortless.
Easy Low Curly Bun for shoulder length hair
Shoulder length curly hair provides the ideal canvas for a low bun. Unlike straight hair, your natural curls create beautiful texture and fullness without requiring extra volume products. Primarily, this style celebrates your curls rather than trying to tame them.
For fine or thin curly hair, this bun works wonderfully as it creates the illusion of thickness. The looseness of the style makes it appear fuller and more voluminous naturally. As a result, it’s become my go-to recommendation for clients with finer curl patterns.
Easy Low Curly Bun styling tips
Creating this style is remarkably straightforward:
- Gather your curls at the nape of your neck
- Secure loosely with an elastic band
- Twist your ponytail around the base
- Pin in place with 3-4 bobby pins
- Gently pull sections to create fullness
In addition to basic tools, I often recommend DevaCurl Light Defining Styling Hair Gel for added definition without crunchiness. Coupled with a quick spritz of water from a spray bottle, this product helps refresh your curls before styling.
Easy Low Curly Bun for formal events
What makes this style so versatile is how easily it transitions from casual to formal. For weddings or special occasions, I’ll add a few simple elements to elevate the look. Alternatively, leaving a few tendrils around the face creates a romantic, effortless vibe perfect for bridal styles.
The low bun position makes it ideal for showcasing statement earrings or necklaces, namely why I’ve styled countless formal events with this updo. The style remains comfortable for hours yet photographs beautifully from every angle – a winning combination for special occasions.
Pinned Crown Updo

The pinned crown updo has been a game-changer in my styling toolkit, offering an elegant solution for those special occasions. This versatile style works beautifully with the natural texture of curly hair, creating a sophisticated look in under 10 minutes.
Pinned Crown Updo for curly hair
Naturally, curly hair provides built-in volume and texture perfect for crown updos. The Dutch braiding technique works wonderfully here – you’ll pull hair in from the front only, creating a clean, simple look while allowing the braid to stand out. First things first, this style embraces your curls rather than fighting them, making it ideal for shoulder-length textures.
Pinned Crown Updo styling tips
To create this style:
- Begin at one side of your head and weave hair into a Dutch braid around your head
- For multiple length curls, create a couple of braids starting at one ear and finishing at the opposite ear
- Secure ends with bobby pins
- Accessorize with gold beads or flowers for extra flair
Use enough pins to feel secure without causing tension headaches. Until you’re comfortable with the technique, practice on slightly damp hair for better control.
Pinned Crown Updo for weddings
Beyond everyday wear, this style shines at formal events. The pinned crown updo photographs beautifully from all angles, making it perfect for wedding days. Primarily, this style withstands humidity and dancing – crucial considerations for special occasions!
Curly Faux Hawk

Looking for an edgy hairstyle that makes a statement? The curly faux hawk offers the perfect blend of boldness and sophistication for those days when I want to step outside my comfort zone.
Curly Faux Hawk edgy look
The beauty of this style lies in its ability to create mohawk vibes without committing to the razor. When styling clients with curls, I’ve noticed how this updo instantly transforms their look from everyday to statement-making. Primarily, the contrast between sleek sides and voluminous center creates that distinctive edgy appearance that photographs beautifully.
Curly Faux Hawk for medium length curls
Creating this style on shoulder-length curly hair:
- Divide hair into three sections (left, middle, right)
- Apply gel to the side sections and smooth them back
- Secure sides with bobby pins in an X-shape for better hold
- Fluff the middle section for volume
- Optional: twist small sections toward the front for added dimension
This approach works well regardless of your curl pattern. As well as being striking, this style shouldn’t pull uncomfortably at your hairline – a quick squint test helps ensure it’s not too tight.
Curly Faux Hawk styling tools
For this look, gather:
- Bobby pins (plenty!)
- Hard-hold gel
- Small comb
- Spray bottle with water
- Optional: texturizing spray for volume
First thing to remember: this entire style takes under 10 minutes with practice, making it perfect for busy mornings when you need something beyond ordinary.
Top Knot with Bangs

The top knot with bangs has quickly become a signature style in my personal repertoire. This boho-meets-glamor updo perfectly balances sophistication with effortlessness, making it ideal for those hectic mornings when I need to look polished without spending hours styling.
Top Knot with Bangs for curly hair
For those with naturally curly textures, this style embraces your hair’s innate volume and movement. A tousled top knot showcases your beautiful curls while the bangs add a framing element that flatters most face shapes. Primarily, curly bangs give this updo a bohemian vibe that straight-haired versions simply can’t achieve.
Throughout my years of styling clients, I’ve noticed how curly hair gives the top knot a beautiful, textured dimension. The natural volume creates a fuller-looking bun without requiring any teasing or extra products.
Top Knot with Bangs styling tips
Creating this look requires minimal effort:
- Separate your bangs and pin them aside temporarily
- Brush remaining hair up to the crown of your head
- Secure with a small hair tie in a high ponytail
- Wrap the ponytail around the base to create your knot
- Secure with bobby pins or another elastic
- Style your bangs to frame your face
Although bobby pins work well, hair grips are even better for keeping your top knot fixed firmly in place. Beyond basic tools, consider using a soft curl tong to refresh your bangs if needed.
Top Knot with Bangs for short curls
Even with shorter curly locks, this style remains accessible. For shorter curls, create a small loop instead of a full wrap around the elastic. Afterward, fan the loop slightly for fuller appearance and secure with pins. This adaptation works beautifully for those growing out a curly bob or dealing with various hair lengths.
Side Swept Twist

When romance is on my agenda, the side swept twist becomes my signature recommendation for clients with curly locks. This elegant style frames the face beautifully while showcasing natural curl patterns in a sophisticated way.
Side Swept Twist for curly hair
The side swept twist celebrates texture rather than hiding it. For my clients with shoulder length curly hair, this style provides that sought-after asymmetrical look that photographs beautifully from every angle. In contrast to styles that require straightening first, this updo works with your natural curl pattern, minimizing heat damage.
I’ve found twisting techniques particularly effective for 4C natural hair, creating a protective style that’s both gentle on strands and visually striking.
Side Swept Twist styling tips
Creating this look requires minimal effort:
- Part hair deeply to one side
- Starting from the fuller side, begin twisting sections back
- Secure with bobby pins as you work around your head
- Leave ends free or tuck them under for a different finish
- Set with light hairspray for all-day hold
Hence, the entire process takes under 10 minutes with practice!
Side Swept Twist for romantic looks
What makes this style perfect for date nights or weddings is its effortless elegance. Even more impressive is how it transitions from day to evening seamlessly. Primarily, I recommend this for clients wanting that “I tried, but not too hard” romantic esthetic that exudes confidence without appearing overdone.
Bow-Tied Puff

I’ve fallen in love with the playful yet elegant bow-tied puff for those days when I want a quick style with a touch of feminine charm. This updo offers a delightful way to showcase curly texture while keeping hair styled and secure.
Bow-Tied Puff for curly hair
Creating a bow-tied puff specifically designed for curly hair has been my mission. Previously, this style typically required straightening curls first, yet I discovered techniques to create beautiful hair bows while embracing natural texture. Beyond that, this style actually benefits from curly volume, providing dimension that straight hair simply can’t match.
For proper moisture balance, I prepare a special spray mixture containing filtered water, organic coconut oil, and conditioner to refresh curls before styling. Primarily, this prevents frizz while maintaining definition. After dampening my curls slightly, I apply Blueberry Bliss Control Paste for extra hold without crunchiness.
Bow-Tied Puff accessories
Finding the right accessories transforms this style completely:
- Velvet bows add an elegant touch to even the simplest puff, creating instant sophistication
- Puff flower clips combine functionality with decorative flair
- Colorful puffy hair bow clips create playful dimension
- Tulle hair puffs offer delicate texture for special occasions
These accessories range from affordable ($3-5) to more luxurious options ($18+), making this style accessible regardless of budget.
Bow-Tied Puff for quick styling
Whenever I need a perfect gym style or want to extend a wash-and-go, the bow-tied puff becomes my trusted companion. This updo requires minimal manipulation—a significant advantage for maintaining curl integrity. Importantly, it’s the ideal low-maintenance style for active days while still looking intentionally styled.
Conclusion
Finding the right hairstyles for curly shoulder length hair doesn’t need to be a daily struggle anymore! These 12 quick updos have transformed my own routine, giving me confidence without stealing my morning. My clients with curly hair repeatedly tell me how these styles have changed their relationship with their beautiful locks.
Above all, these updos celebrate your natural texture rather than fighting against it. The low messy bun and claw clip twist offer effortless elegance for everyday wear, while the French pin chignon and pinned crown updo elevate your look for special occasions. Space buns and the curly faux hawk add playfulness when you want something more creative.
Surprisingly, many people believe updos require hours of styling, expensive tools, or professional help. Actually, every style shared here needs minimal products and tools—usually just some bobby pins, hair ties, and maybe a bit of curl-friendly gel or cream.
Throughout my years as a stylist, I’ve witnessed firsthand how mastering just two or three of these styles can revolutionize someone’s relationship with their curls. My own curly hair journey taught me that embracing texture saves time and promotes healthier hair.
Therefore, I encourage you to experiment with these styles, starting with whichever one caught your eye. Take photos, practice on different days of your wash cycle, and discover which techniques work best with your unique curl pattern.
Ultimately, these updos offer more than just convenience—they provide freedom. Freedom from excessive heat styling, freedom from frustration, and freedom to showcase your beautiful curls confidently. Your curly shoulder length hair isn’t something to “deal with”—it’s something to celebrate with these quick, beautiful styles!
Key Takeaways
Master these time-saving updo techniques to transform your curly hair routine from frustrating to fabulous in just minutes.
• Embrace your natural texture – These 12 updos work WITH your curls, not against them, eliminating the need for heat styling or straightening first.
• 10-minute styling is achievable – From low messy buns to French pin chignons, each style requires minimal tools and can be mastered quickly with practice.
• Versatility spans all occasions – The same basic techniques transition seamlessly from casual errands to formal events with simple adjustments or accessories.
• Minimal tools, maximum impact – Most styles only require bobby pins, hair ties, and optional curl-friendly products, making them budget-friendly and accessible.
• Second or third-day hair works best – Natural oils and texture from unwashed curls actually provide better grip and hold for these updo styles.
These protective styling methods celebrate your curl pattern while offering practical solutions for busy mornings, proving that beautiful hair doesn’t require hours of effort or expensive salon visits.


