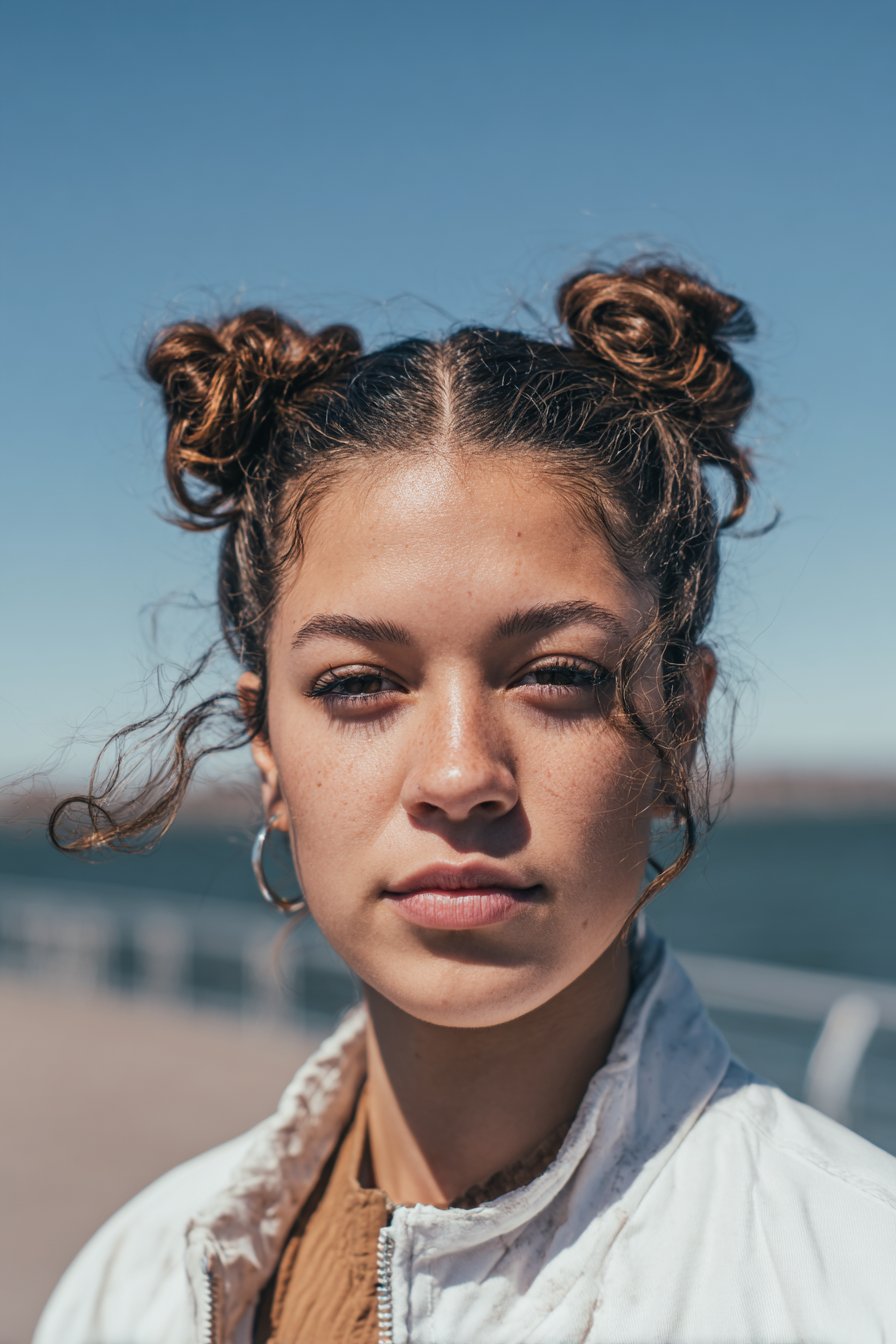
Butterfly haircut curly hair styling has completely transformed my relationship with my unruly locks. When I first discovered this trend that’s amassed over 1.1 billion views on TikTok, I was skeptical about trying it myself. However, after taking the plunge, I’ve never looked back!
If you’re unfamiliar with the butterfly haircut, it features two distinct layer lengths: shorter layers framing your face (typically between cheekbones and jawline) and longer layers that maintain your overall length below the shoulders. What I absolutely love about a curly butterfly haircut is how versatile it can be. Whether you have butterfly haircut long curly hair that cascades down your back or prefer butterfly haircut short curly hair for more bounce, this cut actually works beautifully with your natural texture. I’ve found that styling a butterfly haircut on curly hair is surprisingly manageable, and it’s particularly flattering when combined with bangs. In fact, a butterfly haircut curly hair with bangs creates such a gorgeous face-framing effect!
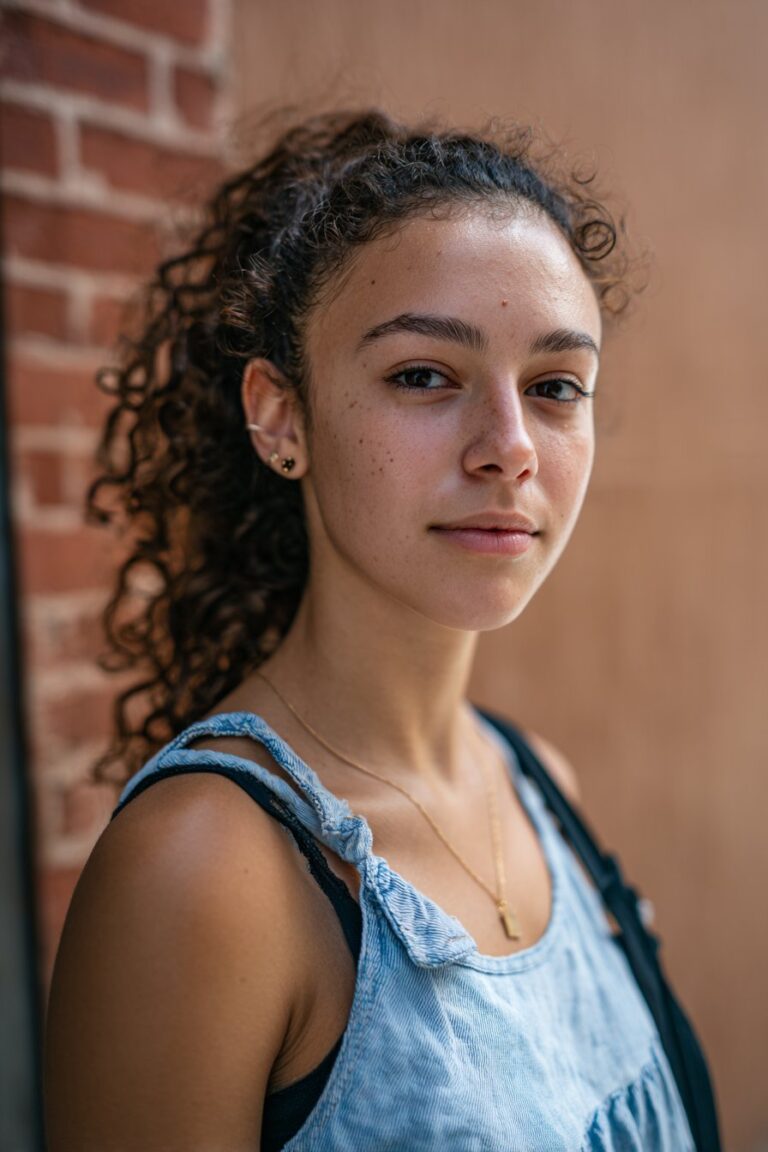
The best part? This cut is especially fantastic for those of us with fine or thin curls because the layered structure adds incredible volume and movement, creating the illusion of fuller, thicker hair. After years of struggling with flat, lifeless curls, I’ve discovered that this cut gives my hair the body and dimension I’ve always wanted. I’m excited to share these 12 styling methods that have given me real, beautiful results. Trust me, when you try these techniques, you’ll wonder why you didn’t get this haircut sooner!
Diffused Volume Curls

Discovering the diffusing technique changed my entire approach to styling my butterfly haircut curly hair. Unlike air-drying, which often left my layered curls weighed down and flat, diffusing lets my natural texture spring to life with gorgeous volume and definition.
Diffused Volume Curls technique
The magic of diffusing a butterfly haircut lies in how it works with the cut’s layers. Since the butterfly cut already removes weight to allow curls to maintain their shape, diffusing enhances this effect by quickly removing water that would otherwise pull curls down.
I typically use three main techniques depending on the look I want:
- Pixie diffusing – My go-to for maximum volume and curl definition. I flip my head upside down, gather sections into the diffuser bowl, press up toward my scalp, and hold for 10-15 seconds with the dryer on low heat. This method sets the curl in a tighter position closer to my head, creating outward volume that beautifully showcases the butterfly cut’s face-framing layers.
- Hover diffusing – For days when I want less frizz, I hold the diffuser a few inches away from my hair without direct contact. This mimics sitting under a salon dryer and works wonderfully for maintaining the length in my longer butterfly layers while still adding body at the roots.
- Stretch diffusing – When I want elongated curls with my butterfly cut, this technique helps maintain length while preventing shrinkage. I gently pull sections downward as I dry them, perfect for showcasing those long layers in the back.
Tools for Diffused Volume Curls
The most essential tool is a quality diffuser attachment with prongs or “fingers” that catch and support curls. These prongs distribute air directly into spiral curls, speeding up drying time while maintaining your curl pattern. The bowl shape disperses airflow evenly, preventing the disruption that causes frizz.
For best results with a butterfly haircut, look for:
- A diffuser with a deep bowl design
- Longer prongs to reach roots through layers
- Multiple heat and speed settings on your dryer
Tips for best results with Diffused Volume Curls
After years of trial and error, I’ve found these strategies work best with my curly butterfly cut:
First, always start by drying your roots, particularly at the crown where the butterfly cut creates layers. Wet roots lead to flat hair, undermining the volume potential of your haircut.
Additionally, when diffusing a butterfly cut, use low heat and high speed instead of high heat. This prevents damage while still providing enough power to dry efficiently. The layered nature of the butterfly cut makes this approach particularly effective since air can circulate between the layers.
Furthermore, cup each section for only 10-15 seconds at a time to prevent curls from drying in unnatural positions. I’ve noticed this especially matters with my face-framing butterfly layers, which need to fall just right.
Finally, for maximum volume with my butterfly cut, I flip my head upside down and diffuse from underneath, allowing the shorter layers to gain lift while the longer layers maintain their length and movement.
Defined Ringlets with Curl Cream

After discovering how curl cream transforms my butterfly haircut, I’ve been able to create defined ringlets that perfectly showcase the cut’s dimension. Throughout my career as a stylist, I’ve found that mastering the art of ringlet definition is essential for those with curly butterfly cuts.
Defined Ringlets with Curl Cream technique
The magic of creating defined ringlets begins with damp hair—not soaking wet, not dry, but that perfect in-between stage. First, I divide my butterfly cut into sections based on the layers. The shorter face-framing sections get special attention as they’re most visible.
My technique involves the “praying hands” method followed by scrunching. I place a small amount of curl cream between my palms, press my hands together like I’m praying, then glide them down each section of hair. Next, I cup my curls in my palm and scrunch upward toward my scalp. This technique distributes product evenly while encouraging curl formation.
For those with butterfly haircuts featuring shorter layers, I pay extra attention to these sections, applying product from roots to ends to ensure every curl is coated. This consistent application creates definition throughout all the layers.
Products used for Defined Ringlets
Through years of experimentation, I’ve discovered certain products work exceptionally well for defining curls in a butterfly haircut:
- Curl-enhancing creams: Products like Moroccanoil Curl Defining Cream provide excellent definition while maintaining movement. For my clients with thicker curls, I often recommend this as a foundation product.
- Mousse or gel: For tighter curls or those needing stronger hold, a quality curl-enhancing mousse or gel provides longer-lasting definition. These products help separate and shape the curls, emphasizing the butterfly wing effect.
When selecting products, I consider curl pattern and desired hold. For looser waves in a butterfly cut, lighter creams work beautifully. For tighter coils, gels offer the necessary structure without stiffness.
How Defined Ringlets enhance butterfly layers
What truly makes defined ringlets spectacular on a butterfly haircut is how they highlight the cut’s natural architecture. The layered structure of a butterfly cut creates natural volume, consequently, when each curl is defined, that volume becomes purposeful rather than chaotic.
The shorter layers around the face spring into bouncy ringlets that frame features beautifully. Meanwhile, the longer layers maintain their length while displaying beautiful curl definition throughout.
Admittedly, the most impressive aspect is how defined ringlets create movement between the two distinct length sections, creating that signature “wing-like” effect that gives the butterfly cut its name. The definition from curl cream provides enough separation between curls to showcase each layer’s placement without creating frizz.
The finished look maintains the butterfly cut’s volume while providing definition that lasts. Clearly, this styling approach lets curly-haired clients enjoy the best of both worlds: structured definition with natural-looking movement.
Half-Up Twist with Face-Framing Layers

For those days when my curls need a quick refresh, the half-up twist has become my ultimate go-to style. This elegant yet effortless look perfectly showcases the dimensional layers of a butterfly haircut on curly hair, creating visual interest without hours of styling.
Half-Up Twist styling method
The half-up twist begins with selecting the right amount of hair. I typically section off just the top third of my hair at the back, rather than half, as this creates a more flattering proportion with curly butterfly cuts. First, I pull forward some strategic face-framing pieces on both sides – including curls from the middle part down to just above my ears. This step is crucial for the butterfly effect, as these freed curls will cascade beautifully around your features.
Next, I separate the top section into left and right portions. I cross these sections over each other at the back of my head, creating a twist, and repeat this motion once more for security. To keep everything in place, I secure the twist with two bobby pins – placing the first pin at the middle of the twist and the second just below it.
For proper pin placement, I insert the first bobby pin straight into the center of the twist, turn slightly left (opposite the twist direction), then right into the twist, pushing it all the way in. This pinning technique has transformed how my styles hold throughout the day!
Why it works for curly butterfly haircut
The genius of this style for butterfly cuts lies in how it embraces rather than fights your natural texture. With waves and curls, fighting against the texture only leads to frustration – hence why I style with techniques that enhance what’s already there.
Moreover, the half-up twist beautifully showcases both length sections of the butterfly cut simultaneously. The shorter layers create volume and frame your face, whereas the longer layers flow freely underneath, creating that signature “butterfly wing” effect. Additionally, this style allows you to maintain the beautiful texture throughout your hairstyle rather than flattening it.
Styling tips for Half-Up Twist
For a polished finish, I always pull out a bit of hair in front of my ears. This creates a softer look and balances any bangs or shorter layers around the face. Accordingly, adjusting these face-framing pieces can dramatically change how the style frames your features.
To tame flyaways without compromising your curl pattern, try this technique: lightly mist a bit of hairspray and gently rake in those pieces to tuck them back into shape. Specifically for the butterfly cut, you can always pull forward to adjust the volume without pressing down or stretching out your curls.
Refresh any curls around your face with a touch of water and additional product as needed. For extra polish, add a decorative clip or small accessory where the twist is secured – this elevates the look instantly for special occasions while keeping your gorgeous curly texture as the star of the show.
Pineapple Updo for Overnight Curls

The pineapple updo technique has been my secret weapon for helping clients maintain their curly butterfly haircuts between wash days. As a hairstylist working with all hair types, I’ve found this method particularly effective for preserving those gorgeous layered curls that make the butterfly cut so special.
Pineapple Updo technique
The pineapple method gets its name from how your hair resembles the crown of a pineapple when done correctly. To achieve this protective style:
- First, flip your head forward and gather all your curls at the very top of your head—right at the crown or hairline. For butterfly cuts specifically, this high placement is crucial as it prevents any flattening of those precious face-framing layers.
- Next, secure your hair with a soft satin or silk scrunchie, looping it only once around your hair. This gentle approach prevents tension and unwanted creases in your curl pattern.
- For those with longer butterfly cuts, consider creating a loose bun at the very top of your head to protect those longer layers. Remember not to twist your hair into the bun, as this can distort your natural curl pattern.
For clients with shorter butterfly cuts or highly layered styles, I recommend creating multiple mini-pineapples throughout your hair to accommodate those shorter sections. This modification works wonderfully for ensuring all layers of the butterfly cut stay protected.
Benefits for butterfly haircut on curly hair
The greatest advantage of the pineapple method for butterfly haircuts is how it preserves both length sections of this cut simultaneously. Given these points, your shorter face-framing layers remain elevated throughout the night, preventing them from getting crushed or flattened.
Primarily, this technique contributes to enhanced root volume—something butterfly cuts are famous for. In fact, many of my clients report better volume on day two and three hair precisely due to sleeping with their hair in a pineapple.
Besides preservation, this method creates a beautiful lived-in texture that actually enhances the butterfly cut’s natural movement, giving you that effortless, tousled look that’s so desirable with this haircut.
How to secure and protect curls
For optimal results, pair your pineapple with additional protective measures. A silk or satin pillowcase reduces friction that causes frizz and breakage. Alternatively, consider using a silk bonnet over your pineapple for complete protection.
In the morning, the take-down process is equally important. Gently remove the scrunchie, then flip your head upside down and lightly shake your curls, allowing them to cascade naturally. For any sections needing revival, lightly mist with a water-conditioner mix.
I learned the value of this technique from a client with gorgeous 3B curls who struggled with keeping her new butterfly cut looking fresh. After showing her the pineapple method, she returned a week later with bouncy, defined curls that maintained perfect shape through five days of wear!
Side Part with Soft Waves

Switching up my part is one of my favorite ways to transform my curly butterfly haircut without any commitment. Throughout my years working with clients, I’ve noticed how a simple side part can breathe new life into curly butterfly cuts, creating asymmetrical volume that’s both sophisticated and playful.
Side Part styling method
Creating the perfect side part for curly hair requires technique. I start with slightly damp hair, using my fingers or a wide-tooth comb to establish the part while my hair still has some moisture. For butterfly cuts, I prefer placing the part just above the arch of my eyebrow—this creates the most flattering asymmetry.
When working with my clients who have butterfly haircuts, I emphasize the importance of establishing the part before drying. For curly textures, trying to change your part after your hair is dry often leads to awkward kinks and resistance.
After setting the part, I typically flip my head upside down while blow drying to add natural lift at the roots. This technique works remarkably well with butterfly cuts because it enhances the volume those inner layers create. For the waves, I wrap the mid-length layers around a large-barrel curling iron, directing them away from my face for that signature winged look.
How it flatters butterfly haircut curly hair with bangs
What makes the side part especially magical for curly butterfly cuts with bangs is how it elongates round and square face shapes. The asymmetry creates a soft diagonal line that naturally slims and contours features.
For clients with curly bangs, I’ve found that a side part allows those shorter face-framing layers to cascade beautifully alongside the face rather than directly onto the forehead. This styling approach works wonderfully for creating that youthful, bouncy finish that butterfly cuts are known for.
The side part naturally directs more weight to one side, allowing the shorter butterfly layers to spring up with added volume on the lighter side. Primarily, this creates movement that flows naturally with your face shape rather than against it.
Tools and products used
For achieving soft waves with a side part on a butterfly cut, I rely on several essential tools:
A large round brush is absolutely non-negotiable—it creates that perfect lift and the flipped ends that define the butterfly style. For my clients with thicker curls, I always recommend lightweight volumizing products that won’t weigh down those crucial top layers.
To maintain the side part throughout the day, I apply a root-lifting spray directly at the parting and crown. Naturally, I finish with a light-hold hairspray that keeps everything in place while still allowing those gorgeous butterfly layers to move freely.
For clients with naturally wavy hair, I often suggest products from collections like Curl Shaper, which adds volume and texture to loose curls using botanical essences without weighing hair down.
Curly Bangs with Air-Dried Texture

Managing curly bangs with a butterfly haircut has become an art form in my styling routine. The beauty of air-dried bangs lies in their natural texture and effortless appearance that perfectly complements the layered dimensions of a butterfly cut.
Air-drying curly bangs
I’ve learned that properly air-drying curly bangs starts with thoroughly saturating them with water. “Make sure your fringe is absolutely drenched with water before applying any product,” as one of my mentors always insisted. This creates the clean slate needed for product application.
Following this, I gently scrunch upward to encourage curl formation without disturbing the natural pattern. The key is minimal touching during the drying process – the more you handle curly bangs, the more they’ll frizz. Throughout years of styling butterfly haircuts, I’ve found that allowing bangs to dry naturally creates the most authentic texture.
How to shape bangs in butterfly haircut
When shaping bangs in a curly butterfly haircut, I focus on creating a seamless transition from short to long. The middle bang typically serves as the shortest point, gradually lengthening toward the sides. This approach ensures the fringe either stays as a distinct element or grows out beautifully as a face frame.
For my clients with butterfly cuts, I recommend using fingers rather than brushes or combs whenever possible. Your fingers naturally enhance each layer’s shape, providing that perfectly tousled feel this cut is known for. Simply twisting and scrunching damp sections forms those piece-y waves that make butterfly cuts so distinctive.
Best products for air-dried texture
My air-dry arsenal for curly bangs includes:
- Lightweight leave-in conditioner – Applied to drenched bangs for moisture and slip
- Curl-enhancing mousse – Scrunched upward for definition without weight
- Hair oil – Used sparingly to tame frizz while maintaining movement
Essentially, these products work together to define without stiffness. For daily refreshes, I revive my fringe with a small bit of water and leave-in or gel, followed by gentle scrunching.
Low Bun with Layered Volume

On days when I want a polished yet effortless look for my curly butterfly haircut, I turn to the low bun style. This versatile updo perfectly showcases the gorgeous layers of a butterfly cut while keeping hair elegantly secured.
Low Bun styling for curly butterfly haircut
Creating a low bun with my curly butterfly haircut works best on third or fourth-day hair. I start by lightly misting my hair to loosen it slightly without completely wetting it. Next, I apply a heavy gel like Eco Gel, which weighs the hair down and provides excellent hold for molding.
The key technique involves brushing all my hair back while gradually molding it into shape. I focus on smoothing underneath sections too, as this creates the foundation for a sleek finish. After securing with a hair tie at the nape, I twist my ponytail and wrap it around the base, creating that classic bun shape.
How to maintain volume in a bun
Although the low bun appears sleek, maintaining volume is crucial for butterfly haircuts. I achieve this by gently pinching and pulling small sections of the bun after it’s formed. This simple technique instantly adds dimension without compromising the style’s structure.
For clients with thicker curls, I recommend placing bobby pins strategically underneath the bun rather than directly on top. Furthermore, leaving a few face-framing pieces out softens the look while highlighting those beautiful butterfly layers.
Occasions this style suits
The low bun works wonderfully for formal events where you want to look sophisticated yet effortless. Naturally, I recommend it for professional settings or whenever you need a polished appearance. The style excels during warm weather, providing a chic solution for keeping curls off your neck without sacrificing style.
Claw Clip Updo with Cascading Layers

I’ve fallen in love with claw clips as my favorite accessory for styling curly butterfly haircuts. These simple tools have completely changed my approach to quick, damage-free updos.
Claw Clip Updo technique
The magic of this style lies in its simplicity. I gather my hair slightly above the nape of my neck, twist it in one direction to create a French twist, thereafter clipping the twisted portion to my scalp. I always allow the remaining hair to cascade out from the top of the clip at the crown, creating that messy-chic look that showcases my layers.
Why it works for long curly butterfly haircut
Claw clips provide secure hold without causing breakage or tension. What’s truly wonderful about using them on butterfly cuts is how they preserve the natural texture throughout the style. The cascading effect perfectly highlights those signature butterfly layers as curls flow freely from the clip. Above all, they’re easy to remove without creating the indents and creases typically associated with other hair accessories.
Tips for securing thick curls
For thicker curls like mine, I recommend twisting your hair 2-3 times counterclockwise before placing the clip. Placement matters too—position it low on the scalp over twisted hair to create a ponytail effect that drapes beautifully over the clip. For additional security, I sometimes use two smaller clips instead of one large one, placing them at slight angles to distribute the weight of my curls evenly.
Twist-Out for Defined Layers

The twist-out technique completely revolutionized how I style my curly butterfly haircut. This method creates defined, bouncy curls that perfectly highlight both the short and long layers of this versatile cut.
Twist-Out method for butterfly haircut
The magic begins with properly sectioned hair. First, I divide my curls into manageable sections—smaller twists produce tighter curls while larger ones create softer volume. After applying my styling products to soaking wet hair, I twist each section by splitting it into two strands and wrapping them around each other. For added definition, I roll the ends with my fingertips.
Undoubtedly, the most crucial step is letting your twists fully dry before unraveling—I typically leave mine overnight. Upon removal, I gently separate the curls using oil-coated fingers to minimize frizz.
How it enhances layered definition
Twist-outs work magnificently with butterfly cuts primarily because they showcase both length sections simultaneously. The technique creates uniform curls throughout the layers, allowing the face-framing pieces to appear bouncy while maintaining the longer sections’ beautiful movement.
Best products for twist-outs
For optimal results, I follow the LOC method—applying leave-in conditioner, oil, then cream. My go-to products include lightweight curl-enhancing creams for definition and sealing butters to lock in moisture. Indeed, the right combination provides both hold and flexibility, ensuring your butterfly layers maintain beautiful definition for days.
Curly Ponytail with Volume at Crown

For curly butterfly haircuts, my high ponytail trick creates the perfect mix of polish and volume. Formerly impossible with my thick curls, this style now stays put all day thanks to two hidden accessories!
Curly Ponytail styling method
The key to this style is starting with fully dried hair—this ensures your curls maintain their shape and volume. For second-day styling, I refresh individual curls first, particularly around my face. Next, I position my ponytail high at the crown, which perfectly showcases the butterfly cut’s face-framing effect while creating that flirty, lifted look.
I secure everything with a coily ponytail holder for gentle hold that won’t create harsh bends in my curls. After securing, I tighten by gently tugging in opposite directions, forcing the holder closer to my scalp.
How to lift crown volume in butterfly haircut
For maximum crown volume, I prepare with dry shampoo first to add texture and lift. Subsequently, I tease the hair at the crown before gathering my ponytail, creating a foundation that prevents flatness. Nonetheless, I don’t fight the natural wispiness—those soft edges actually create a graceful, feminine finish!
Accessories to elevate the look
My game-changing hack: after securing your ponytail, add a small claw clip just beneath the ponytail holder. This prevents sagging throughout the day without requiring a painfully tight elastic. For added dimension, butterfly-shaped clips or decorative coils can transform this practical style into something special for any occasion.
Wash-and-Go with Layered Definition

My absolute favorite daily styling method for my butterfly haircut curly hair has to be the wash-and-go. As someone who values both definition and simplicity, this technique perfectly highlights the beautiful layers of a butterfly cut while requiring minimal effort.
Wash-and-Go technique for curly butterfly haircut
The key to a successful wash-and-go starts with thoroughly wet hair. In the world of curly styling, water is truly your best friend, especially for showcasing those butterfly layers. First, I section my hair to ensure every strand gets proper attention. Typically, I work with 4-6 sections depending on thickness.
I’ve learned that layering products (rather than cocktailing them) gives me more control over how much of each product I apply to different parts of my curly butterfly haircut. I start with a moisturizing hair pudding, working it through from roots to tips, then layer a setting product like hair jelly directly on top without rinsing.
How to define layers naturally
For natural definition in my butterfly cut, I focus on proper product distribution. Generally, I apply styling products while my hair is still wet – this crucial timing creates more defined curls that perfectly accentuate the different length sections.
For certain sections needing extra definition, I gently finger-coil after applying products. This technique works wonderfully on those shorter face-framing pieces that make butterfly cuts so distinctive.
Tips for frizz control
Even though frizz is a normal part of curly hair, controlling it helps showcase the beautiful layering of a butterfly cut. Primarily, I maximize moisture at every step of my routine. Additionally, I’ve swapped my regular towel for a microfiber one that absorbs moisture without roughing up my cuticles.
For midday touch-ups, I keep a lightweight anti-frizz cream handy. Just a small amount revives definition without weighing down those precious layers.
Braided Crown with Loose Curls

The braided crown has rescued many of my clients with butterfly haircut short curly hair on those “nothing is working” days. Throughout my styling career, I’ve witnessed firsthand how this elegant style transforms even the most uncooperative curls into something magical.
Braided Crown styling method
Creating a braided crown starts with sectioning your hair appropriately. Initially, part your hair and create two simple braids, one on each side. For those with butterfly cuts, I typically leave some face-framing pieces loose to maintain that signature layered look. After completing your braids, gently pull at the strands to create a fuller appearance – this “butterfly” effect works beautifully with the existing layers of your cut. Next, wrap each braid around your crown, securing with bobby pins between the stitches of the braid.
How it complements butterfly haircut short curly hair
This style showcases both length sections of the butterfly cut simultaneously. Primarily, the braided crown elevates shorter layers at the crown while allowing longer layers to cascade freely. For clients with shorter butterfly cuts, creating multiple mini-braids throughout works wonderfully for accommodating those shorter sections. The beauty lies in how it transforms everyday curls into something that feels special without fighting your natural texture.
Styling tips for romantic finish
To achieve that dreamy, romantic finish, I always recommend accessorizing with stylish hair clips or flowers. Correspondingly, properly moisturizing your hair beforehand helps maintain health under this protective style. For a softer appearance, gently pull out a few face-framing curls. Plus, regular re-twisting of defined sections maintains freshness throughout wear.
Conclusion
After years of styling curly hair, I’ve truly come to appreciate how versatile the butterfly haircut can be. These twelve styling methods have completely transformed my approach to curly hair care, giving my clients and me countless options for every occasion. My journey with curly butterfly cuts began when a client with beautiful natural curls requested something that would maintain her length while adding movement around her face.
The beauty of this cut undoubtedly lies in its adaptability. Whether you prefer the diffused volume method for maximum bounce or a simple wash-and-go for effortless definition, the layered structure works wonderfully with natural curl patterns rather than against them. Most importantly, these techniques require minimal heat styling, therefore protecting your curls from damage while showcasing their natural beauty.
Many clients walk into my salon frustrated with their curls, feeling limited by styling options. The transformation on their faces when they discover how a butterfly cut enhances rather than fights their texture always makes my day! Additionally, the versatility between casual and formal styles makes this haircut practical for everyday wear while still offering elegant options for special events.
The low-maintenance aspect certainly deserves emphasis too. Styles like the pineapple updo and claw clip cascade allow you to preserve your curls overnight or quickly style them when time is limited. Furthermore, protective styles like the braided crown give your curls a break while still looking polished.
Remember that products matter just as much as techniques when styling curly butterfly cuts. Lightweight formulations generally work best for maintaining volume without weighing down those precious layers. Though product needs vary between curl types, finding your perfect combination transforms styling from frustrating to fun.
My personal favorite aspect of butterfly cuts on curly hair? The way they grow out so beautifully. Unlike some precision cuts that look awkward during the growing-out phase, butterfly cuts maintain their shape and balance as they lengthen, making them surprisingly cost-effective over time.
The butterfly haircut truly celebrates natural texture while providing structure and style. Hopefully these twelve styling methods inspire you to embrace your curls rather than fight them. Trust me – once you experience how this cut enhances your natural pattern while giving you incredible versatility, you’ll wonder why you didn’t try it sooner!
Key Takeaways
Master these proven styling techniques to transform your curly butterfly haircut into gorgeous, manageable styles for any occasion.
• Diffusing creates maximum volume: Use pixie diffusing technique with low heat to enhance the butterfly cut’s natural layers and prevent flat, weighed-down curls.
• Product layering beats mixing: Apply curl cream, then gel separately while hair is soaking wet for better definition and longer-lasting results.
• Protective overnight styling preserves curls: The pineapple updo method maintains volume and curl pattern between wash days, extending your style’s lifespan.
• Strategic parting transforms your look: A simple side part creates asymmetrical volume that flatters face shapes and showcases the butterfly cut’s dimensional layers.
• Quick updos work with natural texture: Claw clips and low buns embrace your curl pattern rather than fighting it, perfect for polished looks in minutes.
The butterfly haircut’s genius lies in working with your natural curl pattern rather than against it. These styling methods prove that curly hair can be both low-maintenance and incredibly versatile, giving you everything from casual wash-and-go styles to elegant formal updos that celebrate your texture.