Low bun hairstyles are my favorite recommendation for formal events because they’re elegant, versatile, and surprisingly achievable at home. Whether you’re drawn to a sleek, polished low bun prom hair look or prefer something romantic and textured, I’ve gathered 12 beautiful low bun prom hairstyle options complete with easy low bun hair tutorials you can follow step-by-step. Each style is designed to make you feel confident and beautiful without the salon price tag.
Classic Sleek Low Bun

The sleek low bun remains one of my absolute favorite low bun prom hairstyles because it delivers that polished, sophisticated look without requiring advanced skills. I’ve styled this classic countless times, and it works beautifully whether you’re heading to prom, a wedding, or any formal event where you want to look effortlessly put-together.
What You’ll Need for This Look
Gathering the right tools makes this easy low bun significantly more achievable. A boar bristle brush is non-negotiable for creating that smooth, bump-free finish. I learned this after years of struggling with regular brushes that just couldn’t grip my hair properly. You’ll also need a strong elastic hair tie (preferably matching your hair color), bobby pins, hair gel or styling cream for hold, a heat protectant, hair serum or oil for shine, and a quality hairspray. If you have particularly long or thick hair, grab a second elastic or a bungee-style hair tie for extra security.
Step-by-Step Low Bun Hair Tutorial
Start with hair that’s slightly damp or second-day hair, as this texture grips products better than freshly washed strands. Apply heat protectant first, then work a quarter-sized amount of gel or styling cream through your hair from roots to mid-lengths. Create your preferred part using the tail of a comb.
Using your boar bristle brush, pull your hair back into a low ponytail at the nape of your neck. The key here is getting it smooth without excessive tension that could cause breakage. Secure with your elastic, then smooth any bumps by running the brush over the surface one more time.
Twist the ponytail tightly and wrap it around the base of your elastic, forming your bun. As you wrap, insert bobby pins periodically to anchor the bun in place. I typically use five to six pins distributed evenly around the base. Don’t worry if a few shorter pieces escape initially.
My Styling Secrets for Extra Shine
The difference between a good sleek bun and a stunning one comes down to shine and finishing. After securing your bun, I apply a lightweight hair oil or serum to the surface of my hair, focusing on any areas that look dull. For flyaways around the hairline, spray a clean toothbrush with hairspray and gently brush those baby hairs into place. This technique works far better than using your fingers.
For that glossy, editorial finish, mist your entire head with hairspray from about six inches away. I learned from working on editorial shoots that the spray distance matters – too close creates buildup, too far provides insufficient hold.
Best Occasions for This Timeless Style
This low bun prom hair works beautifully for formal events where you want the focus on your dress or accessories. I’ve also found it’s perfect for outdoor proms in warm weather since it keeps hair completely off your neck. The style photographs exceptionally well from every angle, which matters when you’re taking dozens of photos throughout the night. Beyond prom, this technique translates seamlessly to bridesmaid duties, galas, or any occasion requiring an elegant, polished appearance that lasts for hours.
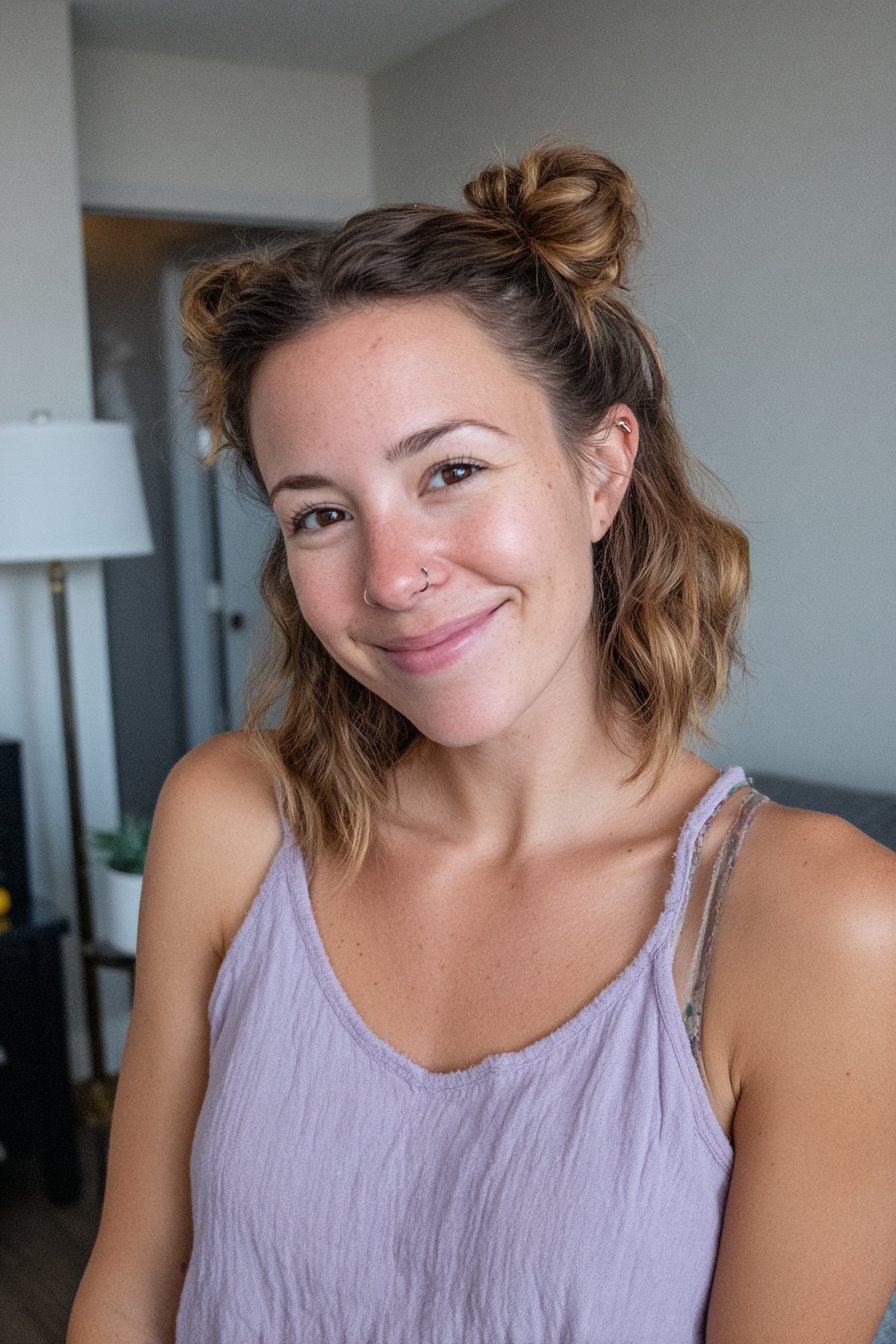
Romantic Messy Low Bun with Face-Framing Pieces

This low bun prom hairstyle became my secret weapon during my early styling years when clients wanted that effortlessly romantic look. The messy low bun with face-framing pieces strikes the perfect balance between polished and relaxed, giving you that editorial vibe without looking like you tried too hard.
Essential Tools and Products
The beauty of this style lies in its simplicity. You need a small hair tie (I prefer the coiled spiral types that grip better), several bobby pins, and a texturizing spray. I’m a big fan of dry texture sprays that add body and grip. If you’re working with freshly washed hair, grab some dry shampoo to add the texture you need. Second or third-day hair actually works better for this style because natural scalp oils and leftover products add the grip that keeps your bun from falling out. A texture paste helps tame and define the strands around your face without making them look crunchy.
How to Create the Perfect Messy Texture
Start by pulling your hair into a low ponytail. Here’s the technique I teach in my workshops: on the last loop of your hair tie, only pull the hair through about halfway to create a loop with the ends sticking out. Take those loose ends and pull them through the center of the looped bun. This entire process takes about 30 seconds.
The magic happens next. Gently pull some pieces out from the bun and loosen the base of your ponytail to give it that relaxed appearance. Don’t aim for perfection because the loose strands and slight unevenness create the messy esthetic.
Securing Loose Pieces Without Looking Overdone
Face-framing pieces add incredible softness to this low bun hairstyle without making it look sloppy. Before creating your bun, leave a few wavy tendrils out intentionally. Use a curl-defining product and create heatless finger waves to shape these strands. I also pull sections out individually after securing the bun and anchor them with bobby pins for a more dimensional look.
Why This Was My Go-To for Years
I wore variations of this messy low bun at least once a week during my freelancing days. It worked for everything from casual client meetings to formal events, and I could create it in two minutes without thinking. The style doesn’t create kinks in your hair and takes on its own personality throughout the day, which means you don’t need constant touch-ups.
Braided Low Bun Prom Hairstyle

Braiding transforms an ordinary low bun into something special, and I learned this technique early in my career when a bride requested something with more texture than a standard chignon. The braided low bun prom hairstyle adds dimension and visual interest while keeping hair secure for hours of dancing.
Supplies You’ll Need
Gather two hair ties (one for the ponytail, one for securing the braid), a hair brush to smooth tangles, two or more bobby pins for anchoring, and finishing spray. Optional but helpful items include alligator clips to separate sections and a hair donut if you want extra volume. I keep elastic bands and bobby pins around my wrist when styling to save time.
Creating the Base Braid
The foundation makes all the difference. Start by brushing through your hair to remove tangles. For all-day hold, tie your hair into a low ponytail at the nape of your neck before braiding. This extra step prevents the braid from loosening throughout the evening.
Braid your entire ponytail in a classic three-strand braid, working all the way down to the ends. Secure the bottom with an elastic band. Here’s a technique I picked up from styling countless formal events: gently pull on the strands within the braid to create a fuller, more romantic appearance. This pancaking effect adds width and makes even fine hair look substantial.
Wrapping and Pinning the Bun
Two wrapping methods work beautifully. For the first approach, wrap the braid towards the left side, then bring the end towards the right to create an upside-down U-shape. Bring the end back down to where the braid started and tuck it underneath.
The alternative method involves wrapping the braid in a circular motion around the base of your ponytail. As you wrap, insert bobby pins along the edge of the bun until it feels secure against your head. I typically distribute pins evenly rather than clustering them in one spot. Note that positioning pins at slight angles provides better grip than inserting them straight.
Adding Finishing Touches
Pull gently on the edges of your completed bun to make it fuller and more dimensional. This adjustment balances the overall proportions. Spray with firm-hold hairspray to help the style stay throughout your event. For added elegance, place a decorative headband one to one and a half inches from your hairline, or add ribbons and flowers for personalization.
Twisted Low Bun with Side Detail

Twisting adds an artistic element to low bun hairstyles that I discovered while experimenting with techniques during my time at Sassoon Academy. The twisted low bun with side detail became one of my signature looks because it combines structure with softness, and it adapts beautifully to any hair type or texture.
What You’ll Need
Your toolkit for this style is straightforward. A rattail comb helps create clean partings, while bobby pins and a hair band secure everything in place. Medium-hold hairspray keeps the style intact without making it stiff. For added fullness, a round bun donut transforms even fine hair into a luxurious-looking bun. I also recommend texture spray or spray wax for grip, and a backcomber if you want extra volume. Hair sectioning clips keep your work organized while building the style.
The Twisting Technique I Swear By
The method I teach starts by dividing a section at the crown, twisting it together, and pinning it against your head. This anchored section becomes your foundation. Pick up a one-inch section from the right side, twist it together, and secure it underneath the crown section. Repeat with a similar section from the left side. Continue alternating right and left twists until you’ve incorporated all your side sections.
For the bun itself, gather remaining hair at the nape and place two fingers underneath this section. Wrap the hair towards the left while bending your fingers downward, hooking them over the hair. Twist the fingers down and towards the right, creating a horizontal loop. Keep twisting while wrapping the hair over itself so it lays against your head in a knot shape. Slide bobby pins into the bun until it feels completely secure.
Building Volume and Dimension
Backcomb the hair at your crown before beginning to create lift. Push the gathered hair upward slightly before pinning to maintain that volume. After creating twists, gently pull on their edges to make them fuller and more dimensional. This pancaking effect adds visual interest without requiring thicker hair.
Perfect for Different Hair Textures
This twisted low bun prom hairstyle works exceptionally well across different textures. Fine hair benefits from the bun donut technique, which creates instant fullness. Curly hair naturally adds texture to the twists. Second-day hair provides better grip for securing pins. The wrapping technique I described adapts to any length past shoulder level, making it accessible whether your hair is mid-length or longer.
Low Bun with Curled Ends Hanging Down

During a bridal styling session years ago, a client asked if we could keep some of her natural curls visible rather than tucking everything away. That request led me to develop this low bun prom hairstyle, which combines the elegance of an updo with the softness of curled pieces cascading down. The result feels romantic without being overly formal.
Tools and Products List
A foam donut bun maker changed how I approach bun styling entirely. I now own both large and small donut sizes because they create instant fullness and structure. Beyond the donut, you need a hair elastic for your initial ponytail, bobby pins for securing curled sections, a curling iron or wand, heat protectant spray, and styling cream to define those hanging pieces. Texture spray works wonders on day-old hair, which I actually prefer for this style. The natural oils and residual product from the previous day provide better grip than freshly washed strands.
Curling Your Ends First
Start with soft beach waves throughout your hair to build texture and grip. This preparatory step makes the finished bun look fuller and more dimensional. After creating waves, leave your hair down and curl specific sections you plan to let hang out. Focus on pieces around your face and a few strands you’ll strategically pull from the back later. The curls should be soft rather than tight, so wrap hair around your iron loosely and hold for just a few seconds.
Creating the Base Bun
Pull your hair into a low ponytail at the nape of your neck, leaving out those pre-curled face-framing sections. Slide the foam donut over your ponytail, positioning it at the base. Tuck your hair around and through the donut, distributing it evenly. Correspondingly, I curl, twist, and fluff each section before pinning it to the low bun. This technique creates texture rather than a smooth finish. The entire gathering process at the nape takes about 30 seconds once you’ve practiced it a few times.
Letting Strategic Pieces Frame Your Face
Pull out additional curled pieces after securing your bun. Apply a small amount of styling cream to these strands to activate and define the curls. The cream prevents frizz while maintaining movement. I finger-curl the front pieces individually for control. The intentional imperfection of hanging curls softens the overall look and photographs beautifully from every angle.
Side-Swept Low Bun Prom Hair

Asymmetry creates visual interest, which is exactly why the side-swept low bun became one of my most-requested low bun prom hairstyles when I started freelancing. The angled placement draws attention and photographs beautifully from every direction.
What You’ll Need for This Asymmetrical Look
Your supplies are minimal but specific. A fine-toothed comb creates the cleanest side part, while a boar bristle brush smooths hair without creating static. Hair ties, bobby pins, and hairspray complete your toolkit. For thick hair or stubborn tangles, spray-on detangler makes brushing significantly easier. Second-day hair works better than freshly washed strands because styling becomes easier and longer-lasting when hair is one day unwashed.
Creating the Side Part
Start by brushing from your ends first, gradually working upward until hair is completely smooth. Using your comb, draw a line through your hair to one side where you want the bun positioned. Apply hairspray sparingly along the part to hold it in place. Comb most of your hair toward the side you’ve chosen for your bun. This asymmetrical distribution creates the foundation for your angled style.
Building the Low Bun on an Angle
Back comb only the roots at the back of your head for lift, being careful not to create tangles. Brush out any bumps that form during this process. Pull hair into a low ponytail positioned on your chosen side rather than centered at the nape. The placement angle matters because side buns need the right amount of volume to look proportional. Secure with your elastic, then wrap the ponytail around the base to form your bun, inserting bobby pins as you work.
Balancing the Overall Shape
Before finishing, pull out a few pieces around your ears to frame your face. These wisps soften the asymmetrical look. Mist with hairspray to lock everything in place.
Textured Low Bun with Mini Braids

Adding mini braids as texture accents changed how I approached low bun prom hairstyles during my freelancing days in New York. A client preparing for an outdoor ceremony wanted something with dimension but not overly structured, which led me to experiment with small accent braids woven throughout the bun rather than one dominant braid.
Essential Supplies
You need hair ties (several small ones for securing individual braids), bobby pins for anchoring everything, a rattail comb for clean sectioning, and texturizing spray. If you want a beaded headband for added elegance, position it one to one and a half inches from your hairline after creating your braids. I keep extra elastics handy because these small braids require individual securing before incorporation.
Adding Small Accent Braids
Start by sectioning off small portions around your face and crown. A lace braid works beautifully as an accent because you only add hair from the front hairline, creating a delicate detail that feels forgiving. I typically create two to three mini braids from different sections. For a more intricate look, dutch braid small sections starting above each ear and bring them back toward where your bun will sit. Secure each braid with a small elastic at the ends.
Combining Braids into the Bun
Gather the remaining unbraided hair into a low ponytail, leaving your accent braids out initially. Create your base bun using your preferred method. Now wrap each accent braid around the bun, starting from different angles to create dimension. I cross the braids over each other when wrapping, pinning them as I work around the perimeter. This layering creates texture without looking overly planned.
Creating That Effortless Vibe
Pull out small pieces around your ears after securing everything to soften the overall appearance. Gently tug on the edges of your accent braids to make them fuller and more relaxed. The beauty of this low bun prom hairstyle lies in its dimensional quality, where each braid catches light differently throughout your evening.
Half-Up Low Bun Combo

Combining a half-up section with a low bun solved one of my biggest styling dilemmas when clients wanted formal elegance but didn’t want to completely hide their hair length. This low bun prom hairstyle offers the best of both worlds because it keeps hair stylishly tucked away while allowing you to show off your length. I started using this technique regularly after realizing how versatile and quick it becomes once mastered.
What You’ll Need
Your toolkit is refreshingly simple. One hair elastic secures your half-up section, while bobby pins anchor the bun in place. Finishing spray keeps flyaways controlled, and texture spray adds grip to help the style stay put. If your bobby pins tend to slip, spray them with hairspray before inserting them for better hold. Besides these essentials, a hair brush helps create smooth sections.
Creating the Half-Up Section First
Draw an imaginary line from ear to ear, sectioning off the top half of your hair. Gather everything above this line, leaving your bang area out initially, then comb the very top section back to create one cohesive portion. Secure this top section with your elastic. For added volume and that relaxed appearance, gently pull on the secured section to loosen it slightly. This creates dimension before you even form the bun.
Building the Low Bun Base
Twist the ponytail into a tight rope, then coil the twisted section around itself to form your bun at the back of your head. As you wrap, insert bobby pins periodically to anchor everything securely. Keep pulling apart and adjusting the bun until it reaches your desired fullness. The wrapping and securing process becomes second nature with practice.
Connecting Both Elements Seamlessly
Brush out the bottom portion of your hair that’s hanging down, styling it however you prefer. The entire process takes a minute or less once you’ve practiced a few times. Mist with finishing spray to keep everything in place throughout your event.
Low Bun with Crown Braid

Crown braids transformed how I approached low bun prom hairstyles after a client mentioned wanting something softer than structured updos. If you know basic three-strand braiding, you can master this look in 15 minutes or less.
Tools You’ll Need
A rat-tail comb creates clean sections, while a brush smooths tangles. You need a spray bottle, one ponytail holder, several small hair elastics, bobby pins, and hairspray or dry wax for hold. Texture powder became my secret weapon for this style.
Starting with the Crown Braid
Begin with wavy or curled hair for grip, then divide into three sections. Braid each section loosely rather than tightly. Sprinkle texture powder on each braid and gently spread the strands apart for that dimensional, slightly messy appearance. For added detail, start with a dutch lace braid using only three stitches before finishing with a regular braid.
Incorporating the Braid into Your Bun
Twist your middle braid and pin it into a low bun at the nape. Cross each side braid over this center bun section and secure with pins. The braids stretched out create a beautiful halo effect.
My Trick for Making It Last All Night
Mist with hairspray after pinning everything. Your hair needs to reach past shoulder length for this technique to work.
Sleek Low Bun Prom Hairstyle with Middle Part

When I discovered a hairstyling hack that had over two million views, I knew I needed to test it myself. The sleek low bun prom hairstyle with middle part seemed deceptively simple, yet it promised that polished, put-together finish I’d struggled to achieve on myself despite years of styling others.
Products for Maximum Sleekness
Gel became my non-negotiable product after trying countless alternatives. Specifically, I picked up Garnier Pure Clean hair gel for $7, which has an almost watery texture but provides all-day hold. A boar bristle brush smooths hair without creating bumps, while a flat iron and heat protectant prepare your foundation. These products transform an ordinary bun into something red-carpet worthy.
Achieving the Perfect Center Part
Divide your hair down the center to create your middle part. This symmetrical foundation sets the entire style.
Creating Ultra-Smooth Sides
Run your flat iron close to the roots before styling to eliminate flyaways and keep texture flat. This step makes a noticeable difference in the final result.
The Easy Low Bun Technique
Pull hair into a low ponytail, wrapping the elastic twice. On the third wrap, pull hair only one-third through, forming a tiny bun. Split remaining hair into two halves, twist them, then wrap around the hair tie until it’s completely covered. Secure with one bobby pin at the base. Pull out shorter face-framing layers for softness. This technique lasts all day without a single hair falling out of place.
Voluminous Low Bun with Teased Crown

Volume at the crown completely changes the proportions of low bun prom hairstyles, and I spent years perfecting this technique after watching brides request that romantic, full look. The teased crown pouf feels sophisticated and current, nothing like the exaggerated bumps from the early 2000s.
What You’ll Need
A fine-tooth teasing comb with a tail end for sectioning became essential in my kit. Your boar-bristle brush smooths the top layer without destroying your teased base. Grab texture spray or dry shampoo, bobby pins, a bun donut for instant fullness, and flexible-hold hairspray. Fortunately, second-day hair provides better grip than freshly washed strands.
Teasing for Height Without Damage
Work only with completely dry hair since wet strands break easily. Section off the top layer you’ll smooth later, then take small one-to-two-inch sections from your crown. Hold each section straight up, then gently push your comb downward toward roots in short strokes. Two to four passes create sufficient volume. Spray each teased section lightly before moving to the next.
Smoothing the Top Layer
Use your boar-bristle brush with an extremely light touch across the surface. Essentially, you’re creating a polished shell over the teased cushion underneath.
Building a Full, Romantic Bun
Gather hair into a low ponytail, slide your bun donut over it, then distribute hair evenly around the donut. Secure with bobby pins and set everything with hairspray.
Boho Low Bun with Loose Waves

Boho styling became my obsession after attending a music festival where I watched women with perfectly imperfect waves that looked effortlessly beautiful. The secret to these low bun prom hairstyles lies in relaxed, undone texture.
Essential Tools and Products
Salt spray transforms damp hair by adding grit and that messy finish I love. A wide-barreled curling iron creates loose waves, while a texturizing spray provides finishing touches. Small flowers like baby’s breath add bohemian charm if you want extra detail.
Creating Soft Waves First
Mist salt spray on damp hair and let it air dry naturally. Alternatively, twist or braid sections of slightly damp hair before bed, then unravel in the morning for soft waves and defined curls that deliver a natural boho finish. Take random sections from top layers and wrap around your curling iron barrel, leaving about half an inch at the ends uncurled for that effortless result. Run fingers through curls to loosen them.
Gathering Hair into a Relaxed Bun
Pull hair into a low ponytail at the back of your head, then roll it into your bun. The deliberately messy construction feels current and relaxed.
Pulling Out Pieces for That Undone Look
Gently tug on a few strands to create volume. This final step transforms structured into beautifully undone.
Conclusion
Not every low bun prom hairstyle on this list will suit your hair type or personal style, and that’s perfectly fine. The beauty of having twelve different options lies in finding the techniques that work specifically for you. Experiment with a few styles during the weeks before your event rather than trying something brand new the night of prom. Once you discover your favorite technique, practice it twice to build confidence. Without a doubt, creating your own prom hair saves money and gives you complete creative control over your final look. You’ve got this, and you’ll look absolutely stunning.