I know the struggle of wanting gorgeous pool party hairstyles while worrying about chlorine, sun damage, and that inevitable cannonball splash. Sunscreen combined with pool water and the sun can take a serious toll on your hair. That’s why I’ve learned to avoid overly complicated styles with exposed parts that leave your scalp vulnerable. Instead, I focus on cute pool hairstyles that look effortless, protect your hair, and survive hours of poolside fun. In this guide, I’m sharing 15 water-resistant poolside hairstyles that blend style with practicality, so you can dive in with confidence.
Sleek Low Bun

The sleek low bun became my favorite poolside hairstyle after watching how well it held up during a beach wedding weekend where half my time was spent in the ocean. This style combines elegance with serious staying power.
What Makes This Style Pool-Proof
Buns rank as one of the best water hairstyles because they minimize hair exposure to chlorine and make it incredibly easy to squeeze water out after a swim. The low positioning sits securely at the nape of your neck, staying put through cannonballs and pool volleyball. Unlike loose styles, everything gets twisted and pinned close to your head, which means less surface area for water damage. I’ve found this works exceptionally well because the tight structure prevents tangling when you’re done swimming.
How to Create the Perfect Low Bun
Start with second or third day hair since it has the natural grit needed to hold the style in place. Part your hair down the center using a tail comb for precision, though you can choose any part that flatters your face shape.
Apply a conditioning mist or smoothing serum from roots to ends, focusing on taming flyaways. Grab a boar bristle brush and smooth your hair back into a low ponytail, angling slightly upward rather than straight down to create lift. Secure with a strong elastic.
Apply a small amount of gel to smooth any bumps along your hairline. Twist the ponytail tightly from base to ends, then wrap it around the elastic base while holding it steady with one finger. Secure the bun with bobby pins, inserting them at angles into the base. Finish with a strong-hold hairspray.
Styling Tips and Variations
For extra security at the pool, use 5-6 bobby pins strategically placed around the bun’s base rather than just 2-3. A light mist of water-resistant hairspray before styling helps control flyaways even after getting wet.
Try wrapping the bun with a colorful hair scarf for added pool party flair, or keep it minimal for an understated look. This style transitions beautifully from poolside to dinner, requiring zero touch-ups throughout your day.
Classic High Ponytail

When I styled hair for a poolside bridal shower last summer, nearly every guest wore a high ponytail. This style has earned its reputation as a go-to for good reason.
What Makes This Style Pool-Proof
The high ponytail ranks among the most versatile pool hairstyles available, combining sporty practicality with a polished look. This style minimizes drag while swimming, keeping your hair compact and reducing resistance in water. Besides being quick to create when you’re short on time, it works beautifully across different hair lengths and textures. The elevated placement at your crown keeps hair off your neck and shoulders, which makes it incredibly easy to squeeze water out after taking a dip.
How to Create the Perfect High Ponytail
Start by brushing your hair thoroughly to remove all tangles and knots. Brush in the direction you want the ponytail to go, sweeping toward the crown of your head. Apply a hair serum to slick back any frizz or flyaways, working it through from roots to ends.
Gather all your hair at the crown, holding it in place with one hand while smoothing out any bumps with your brush. You can add a small amount of gel at this point to further tame stray hairs and create a sleeker overall appearance. Secure the ponytail tightly with a hair tie made specifically for hair, never a rubber band that could tangle or break strands.
Finish by setting the style with hairspray, spraying lightly over the secured portion to lock everything in place.
Styling Tips and Variations
Use a bobby pin to secure any loose strands that escape during pool activities. For those particularly stubborn flyaways that pop up after you’ve finished styling, try this trick: spray a dedicated toothbrush with hairspray and run it along the stray hairs to smooth them down without flattening your overall style.
This cute pool hairstyle transitions effortlessly from morning swim sessions to afternoon barbecues. The beauty lies in its simplicity, requiring minimal products while delivering maximum hold through hours of poolside fun.
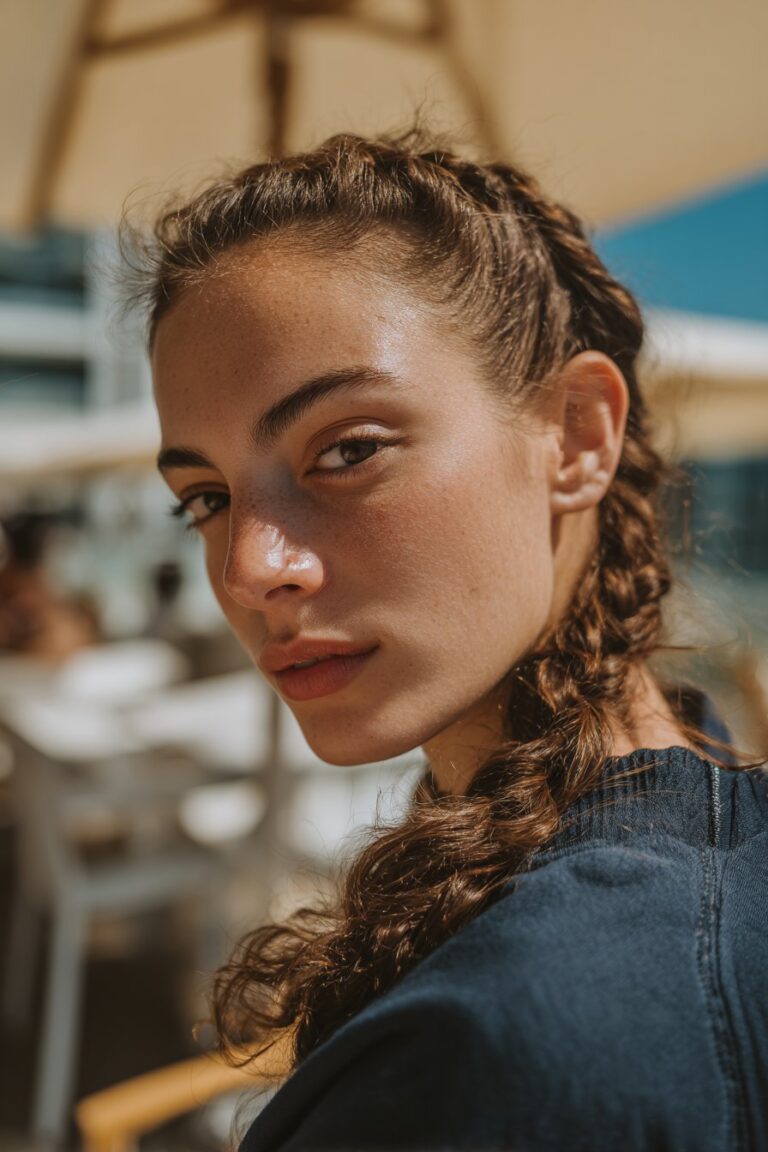
Dutch Braid with Messy Bun

During my time at Sassoon Academy, I watched a fellow student create this Dutch braid combination during a timed styling challenge. The way she secured everything into that textured bun while maintaining the raised braid pattern stuck with me. Years later, it remains one of my most requested pool party hair looks.
What Makes This Style Pool-Proof
Dutch braids differ from French braids in one crucial way: you cross each strand underneath rather than over the middle, creating a three-dimensional raised effect that protrudes from your scalp. This specific braiding method produces a fuller appearance that holds its shape remarkably well when wet.
Braids, buns, and twists function as protective water hairstyles because they keep hair tightly secured and minimize water exposure. The tight weave prevents tangles and reduces contact with chlorine and saltwater. Besides protecting from harsh elements, these styles help retain moisture even in damaging conditions. The combination of a structured Dutch braid flowing into a messy bun gives you both security and style, looking great whether wet or dry.
How to Create the Dutch Braid Bun
- Part your hair down the middle from forehead to nape, creating two equal sections
- Clip one side away while working on the first section
- Take a small section near your hairline and divide into three pieces
- Cross the right strand under the middle, then cross the left strand under the middle
- Continue the Dutch braid pattern, adding hair from each side as you cross under toward the nape
- Once you reach the nape with all hair incorporated, twist the remaining length and wrap into a bun
- Secure with bobby pins and repeat on the opposite side
Styling Tips and Variations
This style takes roughly 10 minutes once you master the crossing-under technique. Gently pull on the braid edges after pinning to create a fuller, more relaxed appearance. The look transitions from beach days to casual outings with friends effortlessly.
Slicked Back Wet Look

I discovered the power of the slicked back wet look during a poolside editorial shoot where we needed hairstyles that looked intentional when wet. The photographer loved how this style transformed from polished to edgy the moment models stepped out of the pool.
What Makes This Style Pool-Proof
Slicked back hair carries that effortless blend of polish and attitude that works whether you’re dry or dripping. This look proves popular due to its versatility across all hair types. The minimal but impactful esthetic shows sleek lines without a hair out of place, making it one of those rare poolside hairstyles that actually improves when wet. Unlike styles that fall apart in water, this one embraces moisture as part of its identity. It hides unwashed hair beautifully, which makes it perfect for extending your wash day while still looking put together at the pool.
How to Create the Slicked Back Look
Start with damp hair rather than soaking wet strands, since too much moisture prevents proper hold. Apply a lightweight volumizing mousse on fine hair to prevent flatness, while thick hair needs strong-hold gel or styling cream worked in section by section. For curly hair, use curl-defining cream or leave-in conditioner applied generously before setting with flat clips.
Layer your products strategically. Begin with a light hold product for control, then finish with strong hold formula to lock everything in. Use a boar bristle brush to smooth hair back, working from roots to ends. Position flat clips along your hairline to hold the style while you apply additional products. For an ultra-clean finish, run the back of a tail comb along edges to refine them.
Styling Tips and Variations
Skip heavy gels that flake and kill shine. Instead, swap gel for a conditioning treatment mixed with mousse for a sleek, hydrated feel with natural hold. This works beautifully worn down, in a low bun, or pulled into a ponytail, giving you options throughout your pool party.
Bubble Braids

A client once asked me for a pool party hair option that felt young and fun but wouldn’t turn into a matted mess after her kids dunged her underwater. Bubble braids solved that problem instantly and became her summer signature style.
What Makes This Style Pool-Proof
Despite the name, bubble braids aren’t actually braids at all. In essence, they’re ponytails where fluffed-out sections are separated by hair ties. This structure keeps your hair contained and tangle-free while swimming. Besides being ultra-secure and low-maintenance, these styles prove surprisingly easy to create. The multiple elastics help manage long, thick, or curly hair, keeping you cool and controlling frizz when temperatures soar. You’ll look effortlessly put together while staying comfortable all day, ready to go from beach to boardwalk without a single tangle.
How to Create Bubble Braids
Start with a high or mid ponytail and secure it with an elastic. Second or third day hair works better because the texture is fuller and elastics grip more easily. Tie small elastics down the length every 2-3 inches. The spacing determines your bubble size: more elastics create smaller bubbles, while fewer elastics produce larger ones.
Gently tug each section outward in all directions to create that signature bubble look. Pull the hair sideways, lift it slightly upward, and round out the bottom of each bubble. Most people find 3-5 bubbles down the ponytail length hits the sweet spot.
Styling Tips and Variations
Spray your hands with hairspray or use styling gel as you work on creating each bubble for better grip and texture. This prevents flyaways while maintaining the puffed effect. Use clear elastics for a sleeker appearance, or opt for colorful hair ties for bolder pool party flair.
Bubble braids look fresh for one full day, stretching to 2-3 days with a satin pillowcase.
Low Bun with Hair Scarf

Adding a scarf to your bun transforms a basic pool hairstyle into something that catches eyes across the deck. This accessory trick jazzes up even the messiest bun, making it look more chic and put together.
What Makes This Style Pool-Proof
A bandana or scarf wrapped around your bun serves double duty at the pool. Beyond adding a pop of color or pattern to your look, it keeps loose strands and flyaways under control throughout the day. The combination gives off a retro, vintage poolside vibe that pairs beautifully with cat-eye sunglasses and a swimsuit cover-up. Choose a quick-dry fabric so it doesn’t stay soggy after swimming. This style works wonderfully for beach days and pool sessions alike, maintaining its charm whether you’re lounging on a chair or climbing out of the water.
How to Create a Scarf-Wrapped Bun
Start by creating a ponytail at whatever height feels comfortable. You can position it high, low, or somewhere in between. Secure with a strong elastic that matches your hair color for a seamless appearance.
Backcomb your ponytail to build voluminous texture. Wrap the ponytail around the elastic base and fix it with bobby pins, creating your bun in whatever method you prefer. Take a silky scarf with an appealing pattern and wrap it once or twice around the bun, crossing the fabric underneath. Tie a knot to secure the scarf, positioning it on top of the bun, underneath, or laterally based on your preference. Pull and pinch the hair above the bun to add volume and create an intentionally messy finish.
Styling Tips and Variations
Lightweight bandanas work particularly well since they dry quickly between dips. Position the scarf across your forehead like a headband for a different esthetic. This cute pool hairstyle transitions effortlessly from water activities to evening gatherings without requiring adjustments.
Rope Twist Ponytail

Rope twists transformed how I styled hair for athletic clients who spent summers between the pool and tennis courts. The technique seemed tricky at first, but once I mastered the crossing pattern, I could create this look in under five minutes.
What Makes This Style Pool-Proof
This style gives the classic ponytail an upgrade while solving every poolside hair concern. Rope braids work beautifully as summer hairstyles since they hold up through heat and activity, making them perfect for beach days. The twisted structure prevents tangling, which means you won’t spend twenty minutes detangling knots after swimming. Most significantly, the rope twist makes it incredibly easy to squeeze excess water out after your swim. The hair stays compact and controlled, keeping your neck cool while you’re lounging poolside between dips.
How to Create the Rope Twist
Pull your hair into a high ponytail and secure with a hair tie. Section your ponytail into two equal pieces. Twist each section individually to the right, working your way down the entire length. This part feels counterintuitive at first since your hands automatically want to twist in opposite directions, but keeping both sections moving identically creates the rope effect.
After both sections are twisted, wrap them around each other in the opposite direction from your twist. Secure the end with another hair tie. The doubled elastic system keeps everything locked in place through cannonballs and underwater handstands. Finish by spritzing with hairspray to set the style.
Styling Tips and Variations
For finer hair that slips out of twists easily, apply a small amount of texturizing spray before creating your ponytail. This adds grip without stiffness. The rope twist ponytail transitions from morning swim practice to afternoon errands without requiring touch-ups, giving you one less thing to worry about during busy summer days.
Double French Braids

French braids became a staple in my styling workshops after I realized how many clients struggled with the crossing technique. Once they mastered it, this style turned into their summer uniform for every pool gathering and beach trip.
What Makes This Style Pool-Proof
French braids function as both fun and practical styles that protect your hair while you’re active and look great for going out. This style holds your hair firmly in place, preventing it from falling apart during swimming while keeping you looking neat and tidy both in and out of the water. Double French braids offer double the charm and security, proving especially beneficial for long hair as they ensure your locks stay neat. This makes them ideal for swimming in both chlorinated pools and salty seas.
How to Create Double French Braids
Your hair will be easier to braid if it’s thoroughly combed and slightly damp. Part your hair down the center using a comb to create a smooth middle part. Clip one side away while working on the first braid.
Take three equal strands of hair near your hairline. French braids have the hair cross over, rather than under, when braiding. Cross the left strand over the middle, then the right strand over the middle. Continue this pattern while adding new sections of hair to both sides as you work down. Once all hair is incorporated, finish with a regular braid and secure with an elastic. Repeat on the opposite side. This process takes 15-20 minutes with a medium skill level.
Styling Tips and Variations
Apply hairspray or leave-in conditioner to prevent frizz and keep braids moisturized. Loosen tight braids by tugging at individual strands for a more relaxed appearance. This style transitions from morning swims to evening cookouts without requiring adjustments.
Braided Bun

Teaching braided buns at my workshops always generates the most excitement because students realize they can combine two techniques they already know into something that looks far more complex than it actually is.
What Makes This Style Pool-Proof
A braided bun delivers the best of both worlds: structured elegance with serious hold. You don’t need a ton of bobby pins to keep everything secure. The braid itself creates natural grip that prevents slipping, while the bun keeps all your hair contained and protected from chlorine exposure. This combination holds up through cannonballs and cocktails, transitioning flawlessly from the pool to the party.
How to Create the Braided Bun
Start with a tight ponytail as your base. For a creative variation, flip your hair upside down and plait from your bottom hairline up to the crown. Once tied in place, continue wrapping the braid into your usual bun shape. Secure with a strong elastic and a few strategic pins to anchor everything. Alternatively, braid your entire ponytail first, then wrap the braid clockwise around the base and pin as you go.
Styling Tips and Variations
A light mist of water-resistant hairspray before styling helps keep flyaways in check, even after a splash session. This style works beautifully for those seeking that polished poolside esthetic without spending excessive time on preparation.
Top Knot with Hat

Pairing a top knot with a poolside hat became one of my favorite styling tricks after watching how effortlessly it worked for a fashion blogger at a resort shoot. She kept her hair perfectly protected while still looking camera-ready between takes.
What Makes This Style Pool-Proof
The top knot ranks as both trendy and functional, holding your hair together whether you’re lounging poolside or taking an unexpected plunge. This style keeps your hair completely out of the way while looking effortlessly chic. Working beautifully for medium to long hair, it provides excellent protection by minimizing exposure to chlorine and sun damage. Unlike loose styles, the elevated positioning stays secure through pool activities and can be easily refreshed after swimming.
How to Create the Top Knot
Gather your hair into a high ponytail at the crown of your head. Twist the entire length tightly, then wrap it around the ponytail base to form your knot. Secure with bobby pins, tucking ends underneath for a cleaner finish.
Styling Tips and Variations
Apply leave-in conditioner before styling to add a protective layer against chlorine and sun. Accessorize with a scrunchie or bandana for extra flair. Alternatively, wear specialized baseball caps designed with magnetic back closures that accommodate your bun.
Faux Braid

The faux braid saved me countless times when styling clients who couldn’t master French braiding but wanted that intricate look for pool parties. In truth, this technique mimics real French braids without requiring advanced skills.
What Makes This Style Pool-Proof
This style works beautifully for people who struggle with traditional braiding techniques. The crisscross method holds hair securely while looking polished both wet and dry. For instance, those with thin hair find this particularly flattering since the technique creates the illusion of fuller braids. You need only 2 hair bands, a comb, and hairspray, making it accessible for quick styling before heading to the pool.
How to Create the Faux Braid
Part your hair and section off one side. Near your part, take a chunk of hair and separate it into 2 pieces. Pull the front piece over the top of the second piece, crisscrossing them. Drop the first section and scoop up another layer of hair into that strand, then crisscross again. Repeat down to your ear, always dropping the front piece to add more hair. Gather remaining hair and braid normally to finish. This takes just minutes per side.
Styling Tips and Variations
Pin both sides up in back for an elegant updo. This works perfectly for casual pool days or when you want to skip washing your hair.
Small Ponytail with Single Braid

Braided ponytails became one of those styles I recommend when someone asks for pool party hairstyles that look polished but won’t consume their morning. A bride’s sister once perfected this technique the week before a destination wedding, creating it poolside every day in under five minutes.
What Makes This Style Pool-Proof
This combination pulls hair completely off your neck and face while the braid adds visual interest. Given that it takes less than 5 minutes once you develop the muscle memory, you spend minimal time styling and maximum time enjoying the pool. The structure keeps hair from getting in the way during swimming, and the elevated ponytail placement makes water removal quick and simple after your swim.
How to Create This Combined Style
Brush your hair into a ponytail at your preferred height and secure with a hair tie. Create three equal sections from your ponytail length. Cross the left section over the middle, then take the right section over the new middle section. Continue this pattern until you run out of hair and secure the ends with another elastic.
Styling Tips and Variations
Especially for pool parties, add gemmed stones, tiny flowers, or colorful ribbons woven through your braid for extra flair. This style highlights your face shape beautifully since everything gets pulled back, creating that fresh, camera-ready look without effort.
Linked Ponytails

My thick-haired clients taught me the value of linked ponytails during those long summer months when single ponytails created painful tension headaches by midday. This technique solved that problem while keeping hair tangle-free through repeated pool sessions.
What Makes This Style Pool-Proof
Linked ponytails totally keep tangles away since everything stays wrapped up and contained. Essentially, you’re creating two separate ponytails positioned one above the other, roughly an inch apart. This split structure takes pressure off your scalp if you have thick hair or a lot of it. Traditional ponytails pull and become painful after a short while, but dividing hair into two manageable sections feels considerably more comfortable to wear. The multiple elastics secure everything firmly, preventing that messy unraveling that happens with single ponytails during active pool time.
How to Create Linked Ponytails
Section your hair horizontally into a top and bottom half. Tie the top section into a ponytail first, then gather the bottom section about half an inch to an inch below and secure it with another elastic. Flip the first ponytail backward so it conceals the hair tie holding the second ponytail. This positioning creates the illusion of much longer hair while keeping everything secure.
Styling Tips and Variations
If your hair feels slippery after washing, spritz in dry shampoo or texture spray for better hold. Use silk hair ties which prove kinder on strands, particularly when removing your style. When you’re ready to take down linked ponytails, grab a seam ripper from your sewing kit or small nail clippers to snap all the elastics quickly.
Wrapped Crown Braid

Crown braids remind me of summer weddings where I’d create this look for bridesmaids who needed something elegant yet pool-friendly for pre-ceremony festivities. This style wraps around your head like an actual crown, giving you that fairytale esthetic while keeping everything secured.
What Makes This Style Pool-Proof
In essence, the crown braid creates a protective barrier around your entire head, keeping hair completely contained and minimizing chlorine contact. This look lasts up to a week once properly set, which means you can create it once and enjoy multiple pool days without restyling. The Dutch braid method works particularly well since it creates a raised, three-dimensional effect that holds its shape beautifully when wet. Besides being remarkably secure, this style proves surprisingly easy even for beginners.
How to Create the Crown Braid
Part your hair to one side, at the center, or from the nape, whichever feels most comfortable. Take a small section near your part and divide into three pieces. Cross strands using either French or Dutch braid technique, adding hair from your scalp as you work around your head. Once you’ve braided around to where you started, secure the end with a clear elastic. Tuck the loose braid end underneath and pin it in place, hiding the elastic for a seamless finish.
Styling Tips and Variations
Gently tug on the braid edges to create fuller, more relaxed volume through a technique called pancaking. Finish with texturizing spray to lock everything in place.
Space Buns

Space buns bring that playful, retro vibe to poolside hairstyles while keeping everything locked down. I started creating these for younger clients heading to music festivals, but they’ve become a pool party staple in my styling rotation.
What Makes This Style Pool-Proof
Space buns feature two symmetrically placed buns high on either side of a center part. This playful look adapts beautifully, working as messy buns for a relaxed feel or sleek versions for polish. Searches for natural bun hairstyles jumped 160%, showing clear demand for versatile updos like this. The high positioning keeps hair completely off your neck while the double-bun structure prevents tangling during swimming.
How to Create Space Buns
Part hair down the center and divide into two equal sections. Smooth each section before securing high ponytails slightly back from the crown. Twist one ponytail firmly from base to ends, then wrap around the elastic base into a bun shape. Tuck ends under and secure with bobby pins, inserting them with ridged sides facing your scalp for maximum grip. Repeat on the opposite side, then gently tug both buns to adjust shape and ensure symmetry.
Styling Tips and Variations
This style works best on second or third day hair. Backcomb at the crown for fine hair, or split thick ponytails into smaller sections before twisting. For curly hair, skip brushing and use leave-in conditioner to gather sections.
Conclusion
Just to reiterate, these 15 pool party hairstyles solve the age-old dilemma of looking fabulous while actually enjoying the water. Given that chlorine and sun exposure can wreak havoc on unprotected hair, these styles keep your locks secured and minimized from damage. Not every style on this list will become your summer signature, and that’s perfectly fine. Experiment with several options to discover which ones suit your hair type and lifestyle best. Some days you’ll want that quick high ponytail, while other times you’ll have the patience for an intricate crown braid. The beauty lies in having multiple go-to options that transition effortlessly from poolside to party without requiring constant touch-ups.